Showing posts with label Stencil. Show all posts

Thursday, August 2, 2018

Breastfeeding Week Art Journal Page

Hi,

Today I am sharing a page that highlights a cause that is very close to my heart - Breastfeeding. Did you know that 1st to 7th August is celebrated as World Breastfeeding Week every year? You may wonder why is there a need to celebrate and promote breastfeeding? Isnt it the most natural thing every mother does for her child? Sadly not. As per statistics published in The Times Of India Online Edition, only 42% Indian infants are breastfeed within 1st hour after birth, i.e. 58% are deprived of the benefits of early feeding & colostrum in India. Not only that, only 55% infants are exclusively breastfed for 1st six months (WHO guidelines). These sort of statistics for breastfeeding are found across the world in many countries and hence, the celebrations for World Breastfeeding Week. Breastfeeding is not luxury. Its birth right of every child who comes to this world. Its the best blessing a mother can give her child. Hence, I created this page around breastfeeding, as my small contribution to the celebrations this year. You can read more about World Breastfeeding Week by visiting here

Breastfeeding Week Art Journal

List Of Supplies:

  • Little Birdie Mixed Media Journal
  • Little Birdie 2 in 1 texture paste (used as gesso) 
  • Lindy's Stamp Gang - Starbust - Baby Blue Eyes Aqua
  • Art Anthology Dimensional Paint - Baby Blue Eyes, Blue Topaz
  • Designs By Ryn - Fiddlehead set
  • Concord & 9th Perfectly Penned Stamp set 
  • Ranger Archival Ink - Cobalt
  • Tim Holtz Mini Stencil
  • Sakura Microns & Brush Pen
  • Ranger Glossy Accent
  • Silver Inka Gold 
  • White card stock
  • Palette knife, paint brush, glue, pencil
Breastfeeding Week Art Journal

Steps to create:
  • Apply gesso on the art journal page and let it dry.
  • Roughly illustrate a mom feeding a baby on the page. 
  • Color the page using Lindy's spray. Instead of using it as a spray, I painted the page with a paint brush using Spray color as an ink. 
  • Once the ink is dry, do 3rd generation stamping using Fiddlehead stamp and blue ink.
  • Apply Art Anthology dimensional paints with help of palette knife and stencil.
  • Once the dimensional paint is dry, rub silver Inka Gold over it.
  • Color the illustration of mom feeding a baby with black pens and add Glossy accents for dimension.
  • To finish the page, stamp (or write freehand) the sentiment and adhere to the journal page.  
The theme at Art Journal Journey this month is "Count Your Blessings" and there can be no bigger blessing than Breastfeeding. I was lucky to be a breastfed child too. Entering my art journal for the challenge here: https://art-journal-journey.blogspot.com/2018/08/count-your-blessings.html 

Please share this page & spread the knowledge & importance of breastfeeding.

Love,
Dr. Neha Sanwalka Rungta
Crafty Flirtations 

Thursday, July 12, 2018

This Too Shall Pass - Art Journal Page

Hi,

Time is one of the most essential and expensive commodities that any person has. It is essential cause you need time to do any work. A lot of us dream for doing so many things in life, but most often, we complain that we dont have time. This is specially the excuse when its about doing something for your personal self - like physical activity or yoga or a hobby or meditation.  However, if you manage your time well, you would never have this excuse and you shall have time for all that you want to do. I also call time expensive, cause once time passes, it is never coming back. You cant relive yesterday - today nor will you be able to relive today again tomorrow. You also dont know what is in store for you tomorrow. All that you have is the current moment that you are living in.

This Too Shall Pass - Art Journal Page 


This brings me to the 3rd aspect of time - "Time Changes" with every single moment. If you are not healthy today, you can change your diet/ activity pattern and get healthy in time. If you are not rich, you can be one if you work hard enough. If you are ill today, take medical treatment and you can feel better tomorrow. Its only a matter of time, how situations and life changes. And that's what the next page in the art journal that I made for Tejal represents.

This Too Shall Pass - Art Journal Page 

"This Too Shall Pass" is Khushboo's favorite quote. Even though I have never interacted personally with her, she is the 3rd musketeer in the trio of Tejal, Saumya & Khusboo and I felt that this art journal would be incomplete without including her favorites. So I requested Saumya to get information from Khushboo. Thanks a ton Saumya for the help.

This Too Shall Pass - Art Journal Page 


As this quote was all about time, all that I have used on this page is clocks. I used various clocks (its just one stamp from Heartfelt Creations, but I think its retired) showing different time points in a day to further re-enforce the fact that time changes. This page is one of my most favorite pages from this art journal.

Supplies used:
This Too Shall Pass - Art Journal Page 

Steps to Create:

  • Apply gesso on card stock/ chipboard base and set aside to dry.
  • Apply Ranger texture paste through  stencil on page.
  • Once dry, apply Oxide inks with help of a blending foam. Use water mister to get desired effects.
  • Once dry, do 2nd generation stamping using clock stamp on page with black ink. 
  • Stamp clock stamp on white card stock using black permanent ink and die cut.
  • Color the clock die cuts using Distress inks. 
  • Adhere the clock die cuts and sentiments on page using glue.
  • To finish the page, add faux running stitch on the page with paint pens.
This Too Shall Pass - Art Journal Page 


You can view the other pages by clicking captions below each image.

Page 1

Page 2
Page 3


Page 4

Page 5


Page 6
I hope you loved this page and are inspired to believe that there is a better time awaiting you in future.

Love,
Dr. Neha Sanwalka Rungta
Crafty Flirtations 

P.S. The page contains some affiliate links without any extra cost to you 

Friday, July 6, 2018

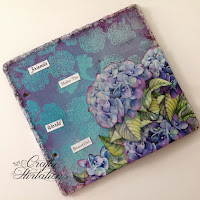
Believe Floral Mixed Media Canvas

Hi,

I always keep sharing mixed media project but what is Mixed Media you may ask? There are many different style of mixed media art that artists create. So what is my style of mixed media art?

Is it using multiple accents/ embellishments on a project? Is it using all techniques I know 1 single project? Is it using multiple (like 5-6 mediums) on one project? Is it using multiple colors on a single project? No, that is not my style.

My style is more restrained. Yes, my mixed media style is about mixing things up be it techniques, embellishments or medium but in a balance and restrain  so as to accentuate every little embellishment or medium used on the project. That's how most of my projects are. I do use multiple textures in my projects and art journals but I dont go over board either. That is just my style of work. I do enjoy other styles too, but just sharing what I enjoy creating the most.

Believe Floral Mixed Media


To express my style better, I am sharing a 6 by 6" floral mixed media panel with you today. I have used cool colors in shades of blue and purple with splatter of green on this panel, i.e. I have used just 1 color family. For embellishments, I have used just flowers.


Supplies used:

  • 6 by 6" MDF
  • Little Birdie (Itsy Bitsy) 2 in 1 texture paste (used as gesso)
  • Ranger texture paste 
  • Penny Black Stencil - Hynotic 
  • Lindy's Starbust Spray - TiffanyLou Blue, Hydrangea Blue 
  • Cosmic Shimmer Spray - Meadow Lush 
  • Ranger Archival Ink - Black
  • Catherine Pooler Ink - Grass Skirt, Lemon Ice 
  • Ranger Dylusion Paint After Midnight
  • Little Birdie Handmade Flowers
  • Heartfelt Creation Camelia Carnation Stamp and Die 
  • Spellbinders Foliage Die 
  • iCraft MDF Sentiment - Believe
  • Wink of Stella Clear Pen
  • Glue gun, blending tool & foam, paint brush, palette  knife
Believe Floral Mixed Media

Steps to Create:
  • Apply gesso on MDF base and set aside to dry.
  • Paint sentiment MDF "believe" with Dylusion paint.
  • Once the base is dry, apply texture paste through stencil on 2 opposite corners and let it dry.
  • Once dry, colour using Lindy's & Cosmic sprays. 
  • Stamp & die cut leaves from Camelia Carnation collection or foliage die and color using yellow and green ink.
  • Adhere the Little birdie flowers and leaves using glue gun to the panel.
  • Finish the panel by gluing the sentiment to the panel. I added a little sparkle to the sentiment using Wink of Stella Pen.
Believe Floral Mixed Media
I would like to enter this project for challenges at:

I hope you like my style of mixed media project.

Love,
Dr. Neha Sanwalka Rungta
Crafty Flirtations 

Wednesday, July 4, 2018

Books are secret magical world - Art Journal Page

Hi,

I am back with another Art Journal page.

They say that books are a man's/ woman's best friend and I so agree to that. I am a book lover & hoarder. I have more books than what I have actually read. I mostly have books on Cooking/ Nutrition/ Health or Art & Craft. I also have read a lot of fiction. I specially love sci-fi/ mythological/ mystery books when it comes to fiction as they open up a magical world wherein you set forward on a journey along with the characters in the book. I am also little crazy and possessive about my books and take the most care of them. I hate it if a page bends or it soils. I hate dog ears in books. You can say, I have OCD when it comes to books.
Books Art Journal Page 

A book with warm cup of coffee is absolute solace for me. I also know that Tejal and Saumya enjoy reading books and are crazy about books as I am. So when I was creating the Art Journal for Tejal, I knew I had to create a page exclusively with books in focus and use a quote that would specify the dream world that books bring forth with them.

Books Art Journal Page

Supplies Used:
  • 6 by 7" card stock/ chipboard 
  • White card stock 
  • Little Birdie Home Decor Chalk Paint - Pink Ballet (Used in place of gesso as a base coat)
  • Carabelle Studio - Alphabet Stencil
  • Tim Holtz Idea-ology mini stencil 
  • Ranger Distress Oxide Ink: Seedless Preserves
  • Lindy's Starburst - TiffanyLou Blue, Hydrangea Blue
  • Ranger Archival Ink - Black 
  • Your Next Stamp - Bookworm Rules 
  • Ranger texture paste
  • Blending tool & foam, palette knife, glue, water mister, heat gun, paint brush  
  • Sakura Gel pens & Steadtler Fine tip pens 
  • Printed sentiment/ quote 
Books Art Journal Page

Steps to create:

  • Apply chalk paint on the card stock/ chipboard base and let it dry. 
  • Once dry, apply Oxide ink on the left half through Tim Holtz stencil.
  • Using a palette knife, apply texture paste through Carabelle Studio stencil on the right half and let it dry.
  • Once dry, color the texture paste using Lindy's spray. Use water mister to get your desired effects.
  • Stamp the image on a card stock using black ink and color using Sakura & Steadtler pens.
  • Adhere the image on the page.
  • To finish the page, adhere quotes using glue. 
Books Art Journal Page

I hope you loved this page on books as much as I loved creating it. You can view previous pages from the Art Journal by clicking on links below. 

Page 1

Page 2

Page 3

Page 4
I shall be back with Page 6 soon.

Love,
Dr. Neha Sanwalka Rungta
Crafty Flirtations

Monday, May 21, 2018

Beauty Emerges From Something Completely Falling Apart - Art Journal

Hello all,

I feel that in life one of the most essential things to be happy is to have "Hope" & "Faith". Hope that even if you are in tough times, better times awaits you. Hope that if you are unwell, you shall get well soon. Hope that all your wishes would come true one day. Along with hope, one also needs to have Faith. Faith not just in God but also in one's own ability to achieve what you want from life.  Faith that even if you fail at something or make a mistake, there is always a chance to succeed next time or correct your mistake.


Page 3 in the art journal that I made for Tejal is all about Hope and Faith. Both me and Tejal have been through difficult times this year. So, this page was a reminder for both of us that even if all doesn't seem okay at the moment, we should have hope and faith that things shall get better soon. And what signifies Hope & Faith better than a butterfly.  Butterflies represent Endurance, Change with Time, Hope and Life. Also, Tejal loves butterflies and hence was an added bonus to use them on this page.  

This page truly did test my hope and faith in myself too while I was creating it as I got some ink marks and texture paste marks on the page which werent as per my plan. But than when I added Butterflies to the page, these marks werent visible. Hence, whenever creating Art Journals dont get scared if you make mistake. You can always rectify it. 
I also wanted to use Khusboo's (Tejal's friend) favorite flower "Lavender" on this page. Lavender are symbol of refinement, grace, and elegance. The last 4 months have taught us that however difficult the situation is, we can always face them and come out as winners with grace and elegance. Hence, field of Lavender flowers was perfect for this page on Hope & Faith. 


Supplies Used:

  • 6 by 7" card stock or chipboard
  • White card stock 
  • Distress Oxide Inks: Broken China, Twisted Citron, Wilted Violet, Worn Lipstick 
  • Itsy Bitsy 2 in 1 texture paste (used as gesso)
  • Memory Box Stencil: Delphinium (#88571)
  • Kaisercraft Butterflies stamp set
  • Ranger Texture Paste
  • Violet Acrylic Paint 
  • Dyan Reaveley's Dylusions Paint Pens 
  • Ranger Black Archival Ink
  • Sakura Water Colour Pens
  • Scissors, Glue, Foam tape, Blending Foam, palette knife
  • Printed quote/ sentiment 


Steps To Create:
  • Apply gesso on the card stock/ chipboard base and let it dry. Blend oxide inks on the background.
  • Mix texture paste with violet acrylic paint and apply through stencil using palette knife. 
  • Once the texture paste is dry, draw stems using paint pens.
  • Stamp butterflies using black ink and fussy cut. Color using water colours (I used Sakura pens).
  • Adhere quote on the base using glue. 
  • Finish the page by adding butterflies. Add some foam tape between 2 layers of big butterflies to add dimension.

I would life to thank Saumya for lending the Memory Box Delphinium stencil to create the look of Lavender flowers :) I shall soon be back with the 4th page. 

View Page 1
View page one
 View Page 2
View Page 2


I would like to enter this art page at 


I shall be back soon with Page 4. 

Love,
Dr. Neha Sanwalka Rungta
Crafty Flirtations 

Wednesday, May 9, 2018

Quick Rustic And Grungy Art Page

Hi Friends,

I am back with another quick & simple art journal spread with a little grungy & rustic look.


Supplies:
  • Gesso
  • Ranger texture paste
  • iCraft stencil
  • Ranger Distress Ink: Peacock Feather, Stormy Sky, Bundled Sage
  • Dymo Label maker
  • Palette Knife, Blending Tool, water mister, kitchen towel, paint brush 
Steps to Create: 
  • Apply gesso on the journal page with paint brush and let it dry. (Tip: Apply thick coats on some places for added texture). 
  • Once the gesso is dry, apply texture paste through stencils with help of palette knife and let it dry. 
  • Once dry, blend distress inks on the page using blending tools.
  • Mist water and dab on various places using kitchen towel to pick up some ink. 
  • Make sentiment using Dymo Label maker & stick on center of the page.
Hope you love the grungy & rustic look of this art journal page.

Love,
Dr. Neha Sanwalka Rungta
Crafty Flirtations 

Saturday, May 5, 2018

Seek Magic - An Art Journal Page

Hi Friends,

Sometimes all it takes to create an art journal is a few Distress inks, a stencil and stamps. I am here to share a simple and elegant art journal spread. 


Supplies:
  • Ranger Distress Ink: Peacock Feather, Stormy Sky, Picked Raspberry, Candied Apple, Black Soot
  • Ranger Black Archival Ink 
  • Dylusions Stamp: Doodle Delight DYR40927
  • Concord & 9th Perfectly Penned Stamp
  • iCraft Stencil
  • We R Memory Keepers M,A,G,I,C mini alphabet stamp sets
  • Sakura White Gelli Roll Pen
  • Water Mister, blending tools, heat gun, paint brush  
Steps to Create:
  • Blend Peacock Feather, Picked Raspberry and Candied Apple ink on the journal using blending tools.
  • Mist with mini mister and dry using a heat gun.
  • Apply Stormy Sky ink over Peacock Feather section through a stencil in some parts. 
  • Apply Picked Raspberry over Picked Raspberry section and Candied Apply over Candied Apple section through a stencil in some parts.
  • Smoosh some Black Soot ink on a craft mat, dilute using some water and make splatters on the journal page using a thin paint brush. 
  • Stamp various images from Dylusions stamp at different heights from bottom of page using black ink.
  • Stamp the sentiment using black ink. 
  • To finish the layout, add highlights on the sentiment using white gel pen.
Hope you all like this art journal page.

Love,
Dr. Neha Sanwalka Rungta
Crafty Flirtations 

Friday, May 4, 2018

Dream - Floral Mixed Media

Hi Friends,

I reviewed the Little Birdie Embossing Texture Paste a few days back. Today I am back with a project where I actually used the Embossing Texture Paste for some quick & amazing effects.


Supplies:
  • Little Birdie 2 in 1 Texture Paste (use as Gesso)
  • Little Birdie Embossing Texture Paste Frosty Fizz
  • Little Birdie Flower Pack 
  • iCraft MDF
  • Penny Black Stencil Hypnotic 
  • Ranger Distress Spray Paint - Squeezed Lemonade + Home made spray inks in shades of yellow and light orange  (numerous recipes available online)
  • Nuvo Embellishment Mousse - Fresh Copper 
  • Palette knife, glue, hot glue gun, flower pollen, heat gun
  • Canvas/ Ply 
Steps To Create
  • Apply some Gesso on the base and let it dry.
  • Adhere mdf with glue and apply Gesso over it.
  • Once the Gesso is dry, colour using spray inks and let it dry.
  • Apply embossing texture paste through stencil and with palette knife on corners and heat set. 
  • Apply nuvo mousse on embellishments and rub here and there on the canvas for added texture.
  • Finish by adhering flowers and pollen. 


Hope you loved this quick, simple & beautiful mix-media layout. I absolutely love the texture created using the Little Birdie paste and how it absorbed some of the colour. 

Do leave your feedback in the comments section.

Love,
Dr. Neha Sanwalka Rungta
Crafty Flirtations 

Friday, April 13, 2018

Pocket Journal Doodling

Hi Friends,

I am going to share 2 very quick pocket journal pages that I did at the start of the year. For both these pocket journal pages, I blended distress ink through stencil on the background and then doodled/tangled over it with Sakura Microns.


The simple doodling is very relaxing & is a huge stress buster.

Love,
Dr. Neha Sanwalka Rungta
Crafty Flirtations

Friday, January 19, 2018

Gears & Sweet Memories - A Mixed-media layout

Hi friends,

I am sharing today a mixed-media layout with a vintage feel that I made for my sister-in-law sometime back. As I wanted a gender neutral project, I used MDF gears to embellish my project.


 The MDF gears are from iCraft by The Craft Studio. iCraft has one of the widest range of gears and lots of other designs in MDF cut-outs with appropriate thickness and clean cuts for any mixed-media project. 


For the base, I coloured a 12 by 12 MDF with Wild Honey Distress Ink in the edges and sealed the ink using Distress glaze. I than tore a pattern paper on edges to give a distressed look and gave it a wash with diluted purple and blue. Once the paint was dry, I adhered pattern paper to coloured MDF base. I added some texture using Ranger texture paste and stencils


I mixed black Fevicryl acrylic paint with Ranger texture paint and used it through Tim Holtz stencil to add texture at places. I also dusted some Perfect Pearls on the textured areas to add the gold touch. 


I used gold, silver, blue and purple Fevicryl acrylic paints to colour the gears.  


This is a metal embellishment that I coloured using similar acrylic colours as MDF. I cut the clock from a pattern paper and pasted it on center of the embellishment. I added some micro-beads and Mod-Podge dimensional to finish it.


Sweet Memories is also an MDF from iCraft and it was heat embossed with Ultra Thick Embossing Powder from Ranger 

I hope you liked this layout.

Love,
Dr. Neha Sanwalka Rungta
Crafty Flirtations 

Friday, January 5, 2018

Rocky Roads Art Journal

Hi Friends,

Happy New Year to all of you. In my 1st blog of 2018, I am sharing an Art Journal Spread with a total of 7 supplies (Apart from basic supplies). I absolutely love the quote "Difficult roads often lead to beautiful destination" as its such a huge motivation and confidence booster and this Art Journal Spread is all about it.


Supplies Used:

  • iCraft Stencil (rock/ stone stencil)
  • Ranger Distress Ink: Picked Raspberry
  • iCraft MDF Phrase 
  • Sakura White Gelli Roll Pen 
  • Sakura Black Brush Pen
  • Ranger Gold Embossing Powder 
  • VersaMark Embossing Inkpad 
  • Basic Supplies: Blending Tool, Heat Gun, Glue
Steps to Create: 
  • Ink the MDF phrase with VersaMark Ink and heat set with Gold embossing powder.
  • On your art journal, blend Distress Ink with help of a blending tool through a stencil.
  • Once you have stencilled on the entire page, colour the negative space using a brush marker or any black pen that is water proof.
  • Once the ink is dry, flicker some water to reactivate Distress Ink and create texture.
  • Outline each stone using white Gelli Roll pen.
  • Adhere the embossed MDF phrase to finish the page. 
Additional Tips
As this was a 4 by 8 stencil, there were a few harsh lines where ever the stencil ended. I connected some Inked rocks with help of paint brush & Ink to remove harsh end-lines of stencils and make the page look more generic 


I hope you like my simple page, yet quirky Art Journal Page.

Love,
Dr. Neha Sanwalka Rungta 

Monday, December 18, 2017

Quick & Simple Christmas Cards

Hi Friends,

As crafters, we often get presented with opportunities where we can bring that extra smile & happiness to some.  I recently visited an old-age home in my vicinity that presented me with one such opportunity. As Christmas is around the corner, along with my friends, I decided to make & donate some Christmas cards for the elderly at old-age home. I didnt have any Christmas themed supplies, so I dug through my stash to create these beautiful cards


Materials Used:

  • Ranger Distress Oxide Ink: Candied Apple
  • Art Anthology Dimensional Paint: Brick (stone effect), Emerald (Gem Stone) 
  • Ranger Red Geranium Archival Ink 
  • iCraft Rose stencil
  • Unity Sentiment Stamp
  • Sequins from Mudra & Papericious
  • Wink Of Stella 
  • White Card stock, Acetate Sheet & Glue

Steps To Create:

  • Make a triangle stencil from an acetate sheet.
  • Cut and score card stock to create a 4 by 6" told folding card.
  • Place the rose stencil on the card and over-lay a triangle stencil on it.
  • Either blend Distress Oxide ink on the card or apply a layer of dimensional paint through the stencil to resemble a Christmas tree.
  • If using Distress Oxide Ink, once the ink is dry, paint over using Wink Of Stella to add Shimmer.
  • Stamp the sentiment using Archival ink.
  • To finish the card, add some sequins on the card to resemble ornaments.

Hope you are inspired to dig through your stash to create cards. 

Love,
Dr. Neha Sanwalka Rungta 

Saturday, December 16, 2017

It's The Seasons To Be Jolly - Art Journal

Hi Friends,

Art journal for me is not just a way of expressing my thoughts, feelings, moods but its also about trying different techniques that I have been meaning to try for a long time. As Christmas is around the corner, I made an art journal page with Ornaments as my focal points and used a few different techniques to create my focal points.


Supplies used:
  • Ranger Distress Ink: Cracked Pistachio, Candied Apple, Wild Honey
  • Cosmic Shimmer Mist: Meadow Lush, Blue Lime
  • Ranger Archival Ink: Red Geranium, Jet Black
  • VersaMark Ink 
  • Art Anthology Dimensional Medium - Brick (Stone Effect)
  • iCraft Stencils
  • iCraft Floral Natura Paper Card stock 
  • Snowflakes Stamp
  • Concord & 9th: Sophisticated Script Stamp Set
  • Ranger Clear Ultra-thick Embossing Enamel (UTEE)
  • WOW Cherry Red Embossing Powder
  • Ranger Glossy Accent 
  • Rhinestones, palate knife, foam tape, yellow floss, circle cutter, heat tool  

Steps to Create:
Background: 
  • Blend Cracked Pistachio ink on the art journal.
  • Stamp snowflakes stamp (2nd generation stamping) using Red Geranium Ink.
  • Spray the cosmic shimmer sprays at a close distance on random spots and let it dry .
Pre-preparation for ornaments:
  • Cut 2" diameter circle from white card stock using circle cutter or a die (6 in number).
  • Blend Wild Honey ink on the cut circles.
  • Cut small small squares from card stock and colour using Candied Apple Ink.


1st Ornament from Left:
  • Blend Candied Apple Ink on the prepared ornament through iCraft circle cluster Stencil.
  • Once the ink is dry, apply Glossy Accent on each of the circles and keep it aside for drying. 
2nd Ornament from Left:
  • Blend Candied Apple Ink on the prepared ornament through iCraft Stencil. 
  • Once the ink is dry, apply a layer of Glossy Accent on the full circle.
  • Once dry, reapply a second coat of Glassy Accent and keep it aside for drying.

Centre Ornament:
  • Rub VersaMark Ink on the prepared ornament and sprinkle UTEE and heat set.
  • Once the UTEE is evenly melted and hot, sprinkle another layer of UTEE and heat set again.
  • Repeat the process 3-4 times to get a thick layer.
  • Once happy with the thickness of the enamel, randomly sprinkle some Cherry Red embossing powder and heat set and while the entire enamel layer is still hot, stamp on it with Snowflakes stamp to give an embossed effect (Rubber stamps work the best for this technique and before stamping on hot layer of enamel, apply VersaMark Ink on the stamp to prevent any damage from Enamel).

4th Ornament from left
  • Simply stamp some snowflakes on prepared ornament and heat set with Cherry Red Embossing powder.

5th Ornament from left
  • Apply a generous layer of stone effect Art Anthology Brick Dimensional paste through iCraft stencil on the prepared ornament and let it dry.
Last Ornament:

  • Splatter few drops of watered-down Candied Apple Ink on the ornament & embellish with a few rhinestones.
To finish all the ornaments:
  • Adhere the coloured red squares and floss on the ornaments to complete them.
Finishing the Art Journal page: 
  • Arrange and mark placement for your ornaments on the page.
  • Using some water-down Candied Apple ink, create a shadow effect on the outer ends of markings (as the Candied Apple ink re-activates some of the green inks on backgrounds, it creates a subtle shadow for ornaments.
  • Once the ink is dry, adhere the ornament  to the page with foam tape and give an uneven outline to the page with colour of your choice.
  • Adhere the extra floss on the backside with glue.
  • To finish, stamp the sentiment using Jet Black Ink and Sophisticated Script Stamp Set.

I hope you enjoyed reading about my Art Journal Page. 

Wish you a Merry & Bright Christmas :) 

Love,
Dr. Neha Sanwalka Rungta
Crafty Flirtations 

Wednesday, May 31, 2017

Cards For Cause - Soldier Drive - May 2017

Hi Friends,

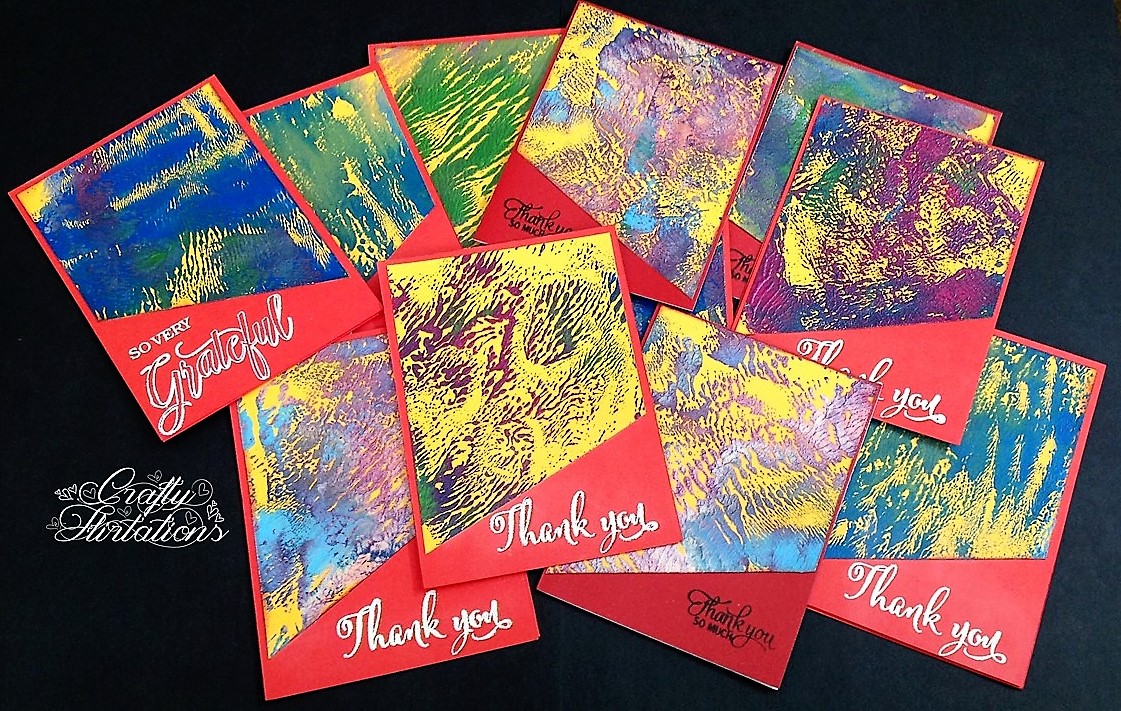
After the last soldier drive during last Diwali, I have been wanting to repeat the drive and send out more cards to Soldiers who take care of our country. So, I undertook another Cards for Cause - Soldier Drive on a personal level and set along to make cards for our brave soldiers. 2 of my Facebook friends Halak Shah & Tanvi Shah also contributed cards to this drive. When I started making cards for the drive, I realised I didnt have any Thank You or Gratitude Stamps. Before I searched online, I asked Varshitha Nagarajan of Mudra Stamps if she had any Thank you or gratitude sentiment stamps . When she got to know what I had set on to do, she very kindly sent me 2 gorgeous stamps from Mudra as her contribution for this drive. Thank you so much Halak, Tanvi & Varshitha for contributing to this drive along with me. The smile on the face of soldiers was priceless.  


Now as I have confirmation that the cards have reached their destination, I am sharing various cards (a total of 128) I made for this drive. The sentiment stamps used as exclusively from Mudra [or from Varna (Mudra was Varna before)] as I wanted to honour Varshitha's contribution towards the drive. I have used various techniques like dendritic mono- printing, stencilling, ink blending with Ranger Distress Oxide inks, Backgrounds with dimensional paints, using pattern paper etc. 


If you would like to participate in future Cards For Cause Drive With Me, Please drop your mail id below.

Hope you like these cards.

With love,
Dr. Neha Sanwalka Rungta