Showing posts with label ATC. Show all posts

Tuesday, January 16, 2018

Doodled ATCs

Hi friends,

Hope 2018 has been going great for you. I am sharing some ATCs I made with doodling sometime back. Hope you like them.


  • Blend Distress ink on 2.5 by 3.5" card stock. 
  • Draw circles of various size on card stock using Sakura Micron and fill them using Sakura Gelli Roll pens.
  • Add highlights to circles.
  • To finish, apply a thin coat Glossy Accent on the edge and sprinkle with glitter. Adhere stamped sentiment using double sided foam tape.

  • Blend Distress Ink in Shades of blue on 2.5 by 3.5" card stock and stamp some pine trees on top using Archival Inks.
  • Stamp some Pine trees on a card stock and fussy cut. 
  • Draw a tortoise on card stock and doodle using various patterns and fussy cut. 
  • Create a slider system on the inked and stamped panel and cover the base using Dress My Craft Frosted Sugar (I used Glossy Accent to adhere Frosted Sugar).
  • Adhere the tortoise on it using home made slider system. 
  • Add a card stock at back and fussy cut pine trees on top. Add some Dress My Craft Frosted Sugar on the Pine trees.
  • To finish the ATC, adhere sentiment (handwritten) using double sided foam tape.


  • Doodle a feather design using Sakura Micron on yellow card stock.
  • Write the sentiment with help of a stencil & Sakura Micron to finish the ATC.


  • Doodle a floral design using various Sakura Gelli Roll pens on black card stock,
  • To finish the ATC, write a sentiment also using Sakura Gelli Roll Pen.


Hope you like these ATC with Doodling.

Love,
Dr. Neha Sanwalka Rungta
Crafty Flirtations 

Sunday, February 12, 2017

Shaker Hourglass ATC

Hi there,

The theme for the month of February 2017 for ATC Swap at "Artist Trading Card Club India" was Shaker Cards. I dont know why, but the moment I read the theme, I knew I wanted to make a Shaker Hourglass ATC. So I gathered my supplies and got on to making this see through, dual sided ATC.


Material:

  • Thick OHP Sheet
  • 1/4" double sided foam tape
  • Dress My Craft Sparkling Sugar
  • Pie Lane Chunky Glitter & Sequins 
  • Washi Tape
  • Pearl Sticker strings
  • Yellow card stock & Sakura Micron 01
  • Glossy Accent
Method: 

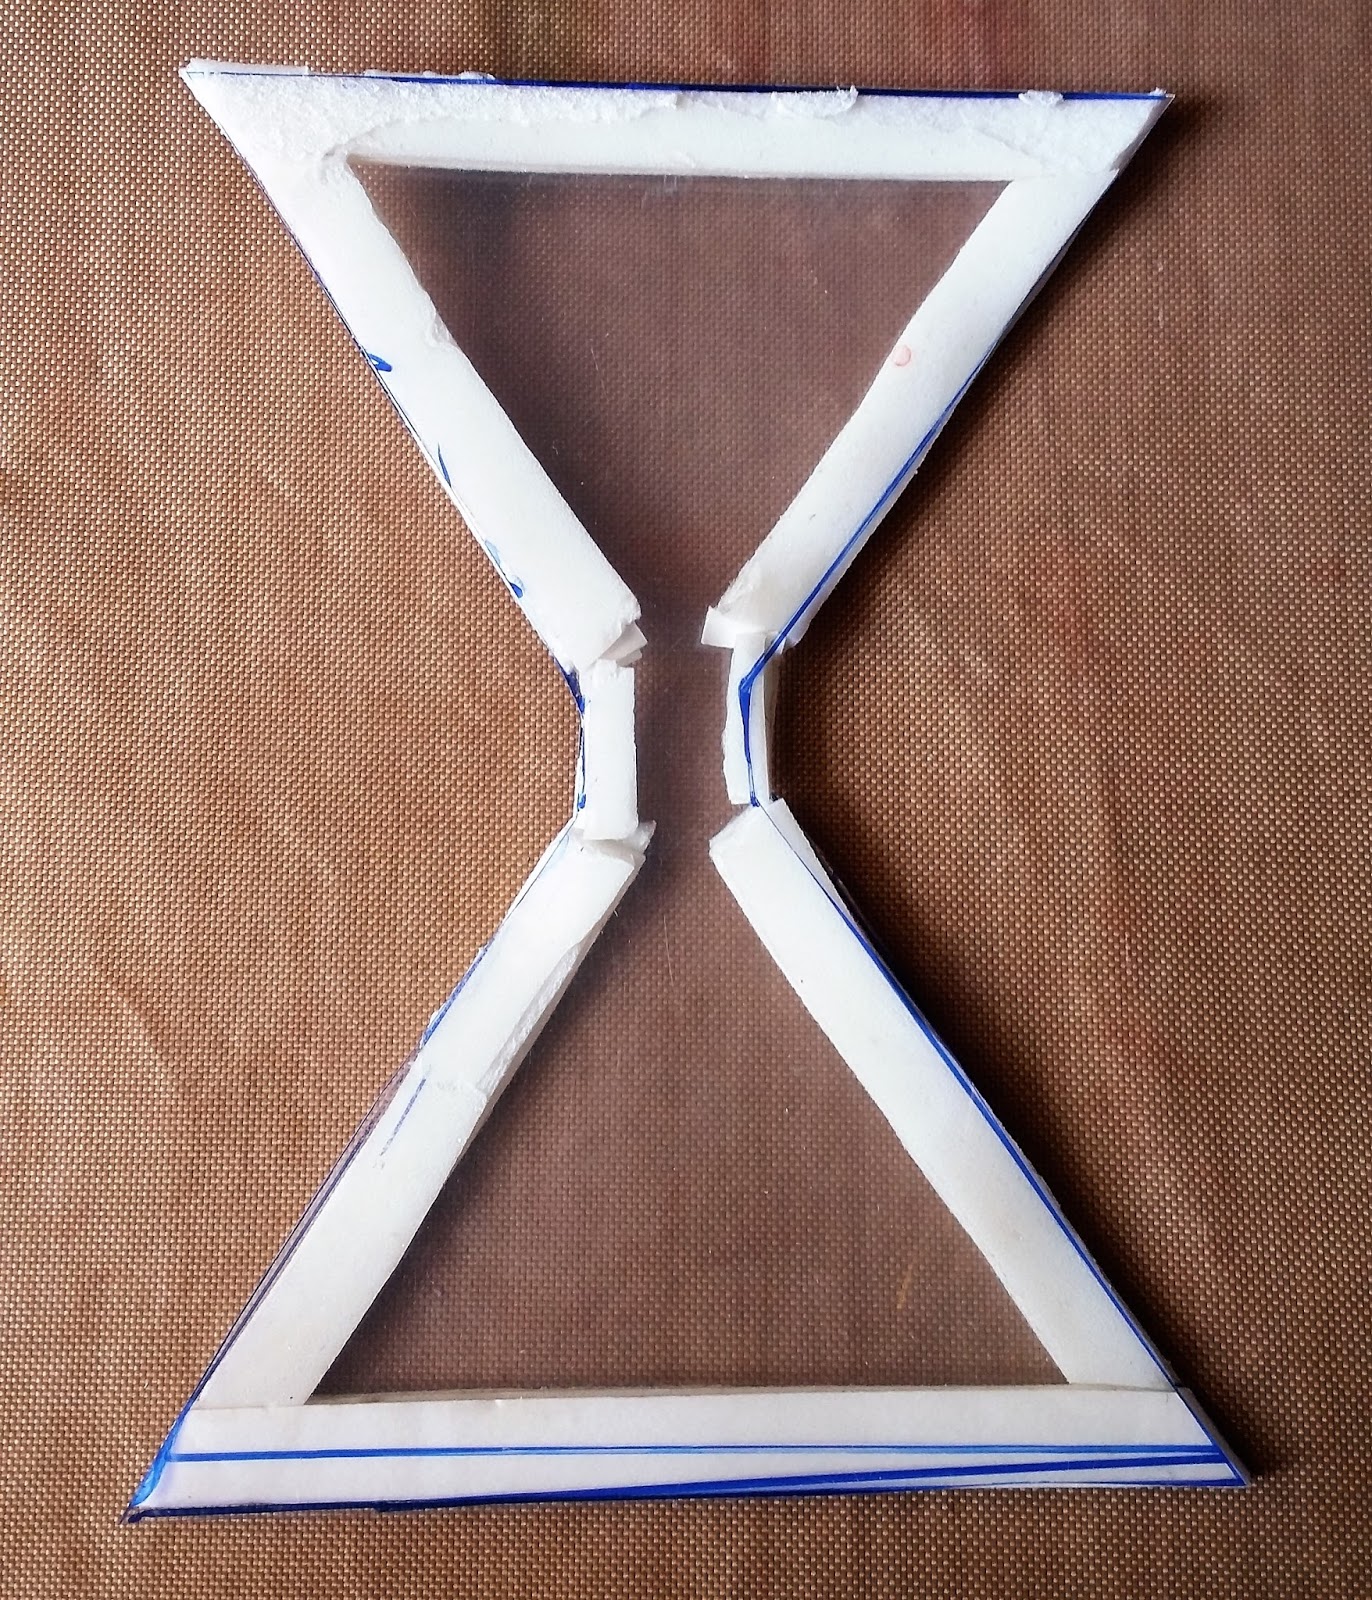
  • Using OHP, I drew and cut 2 identical shapes of an hourglass
  • Using 1/4" double sided foam tape, I adhered the 2 pieces together, making sure that I keep one side open like in the image below


  • Through the open side, I added Dress My Craft Sparkling dust, some chunky glitter & sequins to the shaker & once all my shaker mix was in, I stuck the open side too
  • I added Washi tape to the card to cover up all the foam tape & embellished it with pearl sticker strings
  • I wrote the sentiment on a yellow cardstock using Sakura Micron and adhered it on the edge of the ATC using Glossy Accent
Watch the ATC in Action Here:


Hope you liked the ATC.

With Love,
Dr. Neha Sanwalka
Crafty Flirtations 


Saturday, February 11, 2017

All About ATCs

Hi everyone,

I would like to share some information about Artist Trading Cards (ATCs). 

Artist Trading Cards or more commonly known as ATCs are miniature pieces of arts that are created and traded by artists around the world. Artists create, trade and collect art at organised "swap" events, either in person or online. ATCs are never sold but are always traded. 

ATC trade/swaps have been around for about 20 years now. The 1st ATC swap took place in 1997. In the year 1996 - 97, Swiss artist M Vanci Stirnemann, created 1200 miniature cards and exhibited them at his second-hand bookshop and gallery INK art & text in Zurich, Switzerland from 23rd April - 31st May 1997. On the last day of exhibition, he invited others to create their own cards and trade/ swap with him with the intention to allow people from different backgrounds to participate in an ongoing art project, which was not part of the art market. 

A few weeks after the first ATC exhibition and trading session in Zurich, the Canadian artist Don Mabie adopted the idea and showed artist trading cards at the Alberta College of Art and Design in Calgary, Alberta, Canada. In September 1997, a trading session was organised at the New Gallery in Calgary.

(More About  about history of Original ATC Trading

Today ATCs are exchanged world over by artists either randomly or through organised swaps in person or online. ATCs are created in various medium including dry medium (pencils, pens, markers, etc.), wet media (watercolor, acrylic paints, etc.), paper media (in the form of collage, papercuts, found objects, etc.), or even metals, fiber, wax and other materials. Mixed-Media ATCs are a rage all over the world currently. When making ATCs, you dont have to follow any rule as to what medium you use except 1, i.e. for size. All ATCs have to be of the same standard miniature size of 2 1/2" and 3 1/2".

Here are some of the mixed-media ATCs I have made over last few months using various techniques such as stamping, distress inks, alcohol inks, die cuts, quilling, stickers, stencilling, mixed media etc.


Hope you all liked these ATCs. Do leave some love if you like them.

Love,
Dr. Neha Sanwalka
Crafty Flirtations


Friday, November 25, 2016

Sunflower ATC

Hi Friends,

Today I am sharing 2 Mixed media "2.5 by 2.5" ATC with you all. When I had made the sunflower, I was left with some petals that I made for the flower. These ATC were made with the purpose of using these leftover petals as the focal point.


  • The background was created using Ranger distress inks along with stencilling & stamping with Ranger archival ink. 
  • I adhered the sunflower petals on the left corner and attached tha foam circle on top. 
  • To add texture, I added dots on the circle foam with help of a Sakura micron 
  • For sentiment I stamped "Art Journey" from " Unity Stamp Company" on a piece of small cardstock, distressed edges with aged mohagony distress ink and adhered it with a thick double sided tape
  • To finish the ATC, I mixed some red colour with ranger texture paste and applied on the edges roughly with a spatula
Hope you liked these ATCs

With Love,
Dr. Neha Sanwalka 
Crafty Flirtations 


Tuesday, August 2, 2016

Paisely ATC

Hi Friends,

I know I have been missing from the blog for a very very long time. I have been super busy with either creating from crafty stuff or cooking. I have taken up on cooking majorly in latly few weeks, as I have launched a new venture along with my hubby called "Velvety Delites" - A Home Based Food Venture. 

Getting to today's post, its a tutorial on a very simple ATC.


Materials:
Iris Card Stock : 2.5 by 3.5 "
Artistry Inks: Lime Kiss, Orange Popsicle, Blaze
Artistry blending tool and blending foam
Itsy Bitsy Paisley Stamp Set
Sentiment Stamp from Unity Stamp Company, Moon Crater
Archival Inks: Germanium red and Library green
Glossy accent
Foam tape
Embellishments

Methods:

  • With help of the blending foam, create the background using Artistry inks:  Lime Kiss, Orange Popsicle, Blaze on the Iris Card stock 
  • Stamp different size Paisley Stamps starting from biggest size to the smallest in shades of red and green using Archival Inks Germanium red and Library green
  • Stamp the sentiment using  Germanium red Arhival ink on another piece of archival cardstock and cut it to size
  • Distress the edges with Artistry ink moon crater and adhere to background with help of foam tape
  • Apply dots of glossy accent around the stamped Paisley and adhere some green embellishments around to balance the red sentiment
Hope you guys find the the tutorial informative

Love & Regards,
Dr. Neha Sanwalka 

Monday, June 13, 2016

One Stamp ATC

Hi friends,

I am sharing a mixed-media ATC with you all today. This ATC was made as a part of an Indian ATC exchange group and we were allowed to use only 1 stamp or 1 stamp set to make the ATC. Being the newbie stamper I am, who loves using stamps for everything possible, this was  a great opportunity to look at other supplies I have to complete the ATC. 


Materials Used:

  • Iris Paper
  • Acetate Sheet
  • Distress Ink: Squeezed Lemonade, Wild Honey, Dried Marigold & Aged Mahogany
  • Adirondack Ink: Cranberry & Lettuce
  • Alcohol Blending Solution 
  • Penny Black Clear Stamps - Blooming Garden
  • Blending Foam & Felt 
  • Koi Water Brush
  • Sakura 24 colour water color pen 
  • Helix Alphabet Stencil 
  • Sakura micro 05
  • Butterfly sequins
  • Red tacky tape 
  • Foam tape
  • Paper Twine

Method: 

  • Using distress ink squeezed lemonade, wild honey & dried marigold, I created the background
  • Then I distressed the edges of the background using aged mahogany distress ink
  • For the sentiment, I created the tag using dried marigold & age mahogany 
  • Thereafter, I cut the actate of desired size & using Adirondack Ink Cranberry & Lettuce and alcohol blending solution, I created a random and bright background on the acetate
  • Then I stamped the desired flower design on another cardstock and coloured using sakura 24 water colour pen & fussy cut it
  • Using the alphabet stencil, I wrote the sentiment on the sentiment tag with help of Sakura Micron 
  • Once all the elements were ready, with help of red tacky tape, I adhered the acetate background on the big background at the lower bottom , leaving it open from top (notice the acetate is adhered off centre to create balance)
  • Then I took a piece of orange twine and tied it around the base
  • With the help of foam tape, I attached the stamped flower on top of the twine
  • I punched a hole on the sentiment tag and adhered a piece twine through it & placed it in between the acetate sheet & the background
  • Finally to finish the ATC, I added some butterly sequins around the acetate 
Hope you liked the tutorial & were inspired 

Love,
Dr. Neha Sanwalka
Crafty Flirtations