Today I bring to you an experiment that I have been wanting to do for a long time & the results of which I am totally in love with. I used Mudra Daisy Bloom Layering Stamp Set. I have double heat embossed the flowers in the card below, i.e. both the yellow & red in the card below are heat embossed. Read below for instructions
Close Up Of Flower: I love how the red & yellow split and mix to form orange and give a very rustic & realistic look to the flowers
Material:
Mudra Daisy Bloom Stamp Set
Mudra Happy Birthday Sentiment Stamp Set
Watermark Versamark Ink
WOW Primary Yellow embossing powder
WOW Primary Cherry Red embossing powder
Scattered Straw Distress Ink
White Cardstock, Vellum & Ranger Heat gun
Instructions:
Stamp the 1st layer of Daisy Bloom stamp with Versamark ink, sprinkle with WOW Primary Yellow embossing powder and heat set
Stamp the 2nd layer of Daisy Bloom stamp with Versamark ink, sprinkle with WOW Primary Cherry Red embossing powder and heat set just enough to melt the red embossing powder into yellow. Be careful to not overheat
Distress edges of cardstock with scattered straw distress ink
Stamp the "Happy Birthday" sentiment on vellum with Versamark ink, sprinkle with WOW Primary Cherry Red and heat set
Put the card together and add some sequins to complete the card
Hope you all love the double heat embossed flowers on my card.
I am here today with a very special post. One of my close friends Hetal (I have known her for almost 16.5 years now), wanted to learn distress ink techniques for a long time. Initially we had thought we would make cards with the background we create, but her nephew turns "6 months" this month and so we decided to make 5" by 7" scrapbook instead of cards with all the distress ink techniques we do.
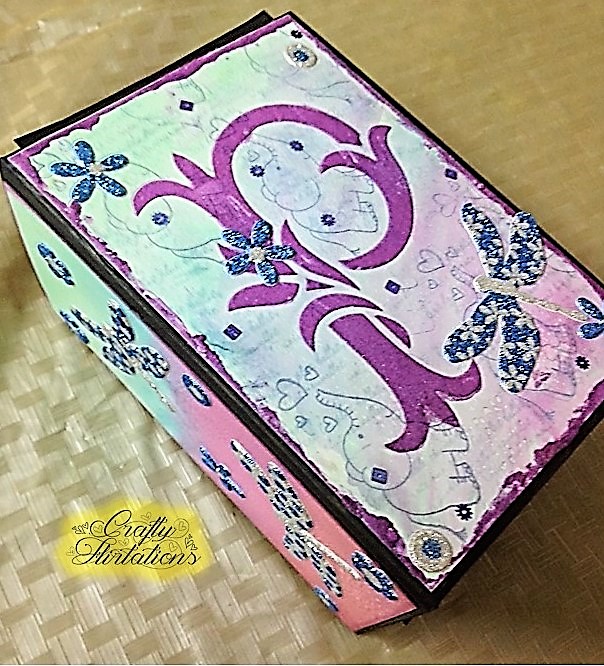
Her nephew's name starts from "P" and is a Leo. So we have incorporated a lot of these elements in the scrapbook. Also the little boy loves multi-colours and as he is a small kid, we decided to use different colours through the scrapbook and not just the usual shades of blues & purples that are conventionally used for boys scrapbook. Along with distress ink techniques, we also used artistry inks (Indian brand), stencil techniques, stamping, spray paints & gelatos for some of the pages in the scrapbook. Hetal picked up distress ink techniques very quickly and I am so proud of her 1st time efforts distressing & making this album. So here is presenting the scrapbook that the 2 of us built together. I have mentioned various techniques & main supplies we have used for each of pages below the images along with those used for the cover page. 270 gsm Iris Paper was used to create all Backgrounds. There is also a small video at the end to show you all the interactive elements that we had incorporated in the album.
P Stencil is from Pie Lane & Stenciled With Ranger Texture paste mixed with Pixie Glitter from Pie Lane & Lavender Acscents Spray Paint from Hampton Art. The same texture paint was applied on edges with spatula
Stamps Used: Penny Black Jumbo Love & Bo Bunny It is Written
Distress Inks For Background: Peacock Feather, Cracker Pistachio, Seedless Preserve
Distress Inks For Background: Fried Brick, Wild Honey, Peeled Paint, Rusty Hinge
Stamps: Stampendous Peony
Technique: Water Lifting
Inks For Background: Lime Kiss Artistry
Stencil: Pie Lane Leo Stencil stenciled with Blaze Artistry Ink
Stamp: Prima Checkered Stamp
Gelatos on left background: Blueberry, Boysenberry, Cotton Candy, Grape Grape
Gelatos on right background: Pistachio, Green Tea, Lime Lime, Spearmint
Technique: Drip technique
Inks Used For Background: Artistry Blaze & Distress Peacock Feather
Stamp Used: Scrapberry Kids Fun Happy Birthday
Ink for background: Distress Seedless Preserves & Artsitry Lavedner
Whimsy Holly
Ink For Background: Artistry Blaze
Technique on background: Stamping with pearlised water
Gelatos on left: Blueberry, Boysenberry, Cotton Candy, Grape Grape
Stamp Used: Scrapberry Mother's Treasure First Smile
Distress Inks on Left Page: Cracked Pistachio, Seedless Preserve, Peacock Feather, Pine needles
Stamp used: Itsy Bitsy Fazzy Blutterly
Technique Used: Resist technique using Clear embossing powder
Distress ink on Left: Seedless preserve & Faded Jeans
Stamp Used: Lawn Fawn Whale You Be Mine
Inks for background: Distress Dried Marigold, Distress Stormy Sky, Artistry Moon Crate, Artistry Lime Kiss
Stamp: Lawn Fawn Pa Rum Pa Pum Pum
Artistry Inks Used For Background: Blaze, Orange Popsicle & Lime Kiss
Technique: Resist technique using white embossing power
Artistry Inks Used For Background: Blaze, Orange Popsicle & Lime Kiss
Technique: Resist technique using Versamark Ink
Background w as done using distress ink smoosh technqiue
Stamp: We R Memory Keepers P alphabet and stamped using gelatos
Also used Bo Bunny It is Written Stamp
Inks for background: Lime Kiss Artistry, Artistry Dark Garnet & Peeled Paint Distress Ink
Techniques: Applied Artistry Dark Garnet & Peeled Paint Distress Ink on bubble wrap paper and stamped on Iris Paper. We then Spritzed it with pearlized water and allowed artistry & distress colours to bleed and blend. Then we applied Lime Kiss artistry colour on top to blend and bring it all together.
Stamp used: Kaiser craft wood grain & Scrapberry kids fun happy birthday stamp
Stamp used: Kaiser craft wood grain & Scrapberry kids fun happy birthday stamp
Here is a small interactive video:
Hope You All Liked The Beautiful Scrapbook We Both Made
I am back with a simple Mixed-Media mini-canvas. I celebrated 3 years of togetherness with my husband recently (i.e. 3 years of knowing each other) & I made him a mini-canvas as a gift :)
Materials Used:
Mini Canvas 4 by 6"
Gesso
Paint brush
Fevicryl ultramarine blue acrylic colour
Ranger texture paste
Spatula
Pie Lane background stencil
Cracked Pistachio Distress Ink
Aged Mahogany Distress Ink
Finger Sponge dauber
Sakura brown water colour pen
Scallop rose foam die cut (I had got these as a gift from the fabulous Dr. Sonia as a part of her blog giveaway)
Leaves cut out from green foam
Glitter styrofoam balls - 1/2 cm diameter
Stamps for sentiments
Ranger Archival Jet Black Ink
Hot glue gun
Method:
Apply a layer of gesso on canvas with paint brush and let it dry
Mix some gesso with Fevicryl ultramarine blue acrylic colour and paint the canvas in shades of blue
Once dry, using the Pie-Lane background stencil and spatula apply Ranger texture paste on the canvas
Once the Ranger paste is dry, apply Cracked Pistachio Distress Ink with sponge finger duaber over the texture paste and define the edges with brown marker or water colour pen
I added some texture by stamping some musical notes
Shape the scallop flowers die cut to make roses
Cut leaves from a green foam sheet
Stick scallop roses, leaves and glitter ball as desired using hot glue gun
Stamp the sentiment and distress the edges using Aged Mahogany Distress Ink before adhering it to the canvas
I am sharing a mixed-media ATC with you all today. This ATC was made as a part of an Indian ATC exchange group and we were allowed to use only 1 stamp or 1 stamp set to make the ATC. Being the newbie stamper I am, who loves using stamps for everything possible, this was a great opportunity to look at other supplies I have to complete the ATC.
Using distress ink squeezed lemonade, wild honey & dried marigold, I created the background
Then I distressed the edges of the background using aged mahogany distress ink
For the sentiment, I created the tag using dried marigold & age mahogany
Thereafter, I cut the actate of desired size & using Adirondack Ink Cranberry & Lettuce and alcohol blending solution, I created a random and bright background on the acetate
Then I stamped the desired flower design on another cardstock and coloured using sakura 24 water colour pen & fussy cut it
Using the alphabet stencil, I wrote the sentiment on the sentiment tag with help of Sakura Micron
Once all the elements were ready, with help of red tacky tape, I adhered the acetate background on the big background at the lower bottom , leaving it open from top (notice the acetate is adhered off centre to create balance)
Then I took a piece of orange twine and tied it around the base
With the help of foam tape, I attached the stamped flower on top of the twine
I punched a hole on the sentiment tag and adhered a piece twine through it & placed it in between the acetate sheet & the background
Finally to finish the ATC, I added some butterly sequins around the acetate
Welcome to the Part 3 of Stencilling Techniques used in "Happy Anniversary AJ" banner. Hope you enjoyed the techniques shared in the Part 1 & Part 2 of the Stencilling techniques used in the "Happy Anniversary AJ" banner. The stencils used for the project are from Pie Lane and can be ordered from Maninder Kaur of Rainbow Craftykari (Please check Part 1 to see the designs).
Happy Anniversary AJ
In Part 3, I am going to share all the stencilling techniques I have used for initials of the couples name "AJ".
Die-cutting with stencil - Stencilling Tutorial/ Technique
Die-cutting Technique using negatives: This technique was suggested by Maninder Kaur of Rainbow Craftykari when I got the stencils from her. I took a pattern paper (this pattern paper is from Papericious) and outlined the design on the paper on the right side (i.e. the side I wanted on top). Then with the help of Gyro-cut tool, I cut entire stencil for both alphabets "A" and "J". Once the stencils were cut, I pasted the design on green pattern paper to get the final design.
Additional Tips: Check Part 2, alphabet "S" to know how you can use the positives from this technique too
To bring together the whole banner, we cut the white textured paper in the desired size. Thereafter we took some red card stock and cut them intro desired size and distressed the corner with Aged Mahogany distress ink. We stuck the alphabets on the red background, punched wholes on top with punch machine and used a white string to bring together the entire banner.
Happy Anniversary AJ
Hope you all have loved the "Happy Anniversary AJ" banners and the techniques used for it.
Welcome to the Part 2 of Stencilling Techniques used in "Happy Anniversary AJ" banner. Hope you enjoyed the techniques shared in the Part 1 of the Stencilling techniques used in the "Happy Anniversary AJ" banner. The stencils used for the project are from Pie Lane and can be ordered from Maninder Kaur of Rainbow Craftykari (Please check Part 1 to see the designs).
Happy Anniversary AJ
In Part 2, I am going to share all the stencilling techniques I have used for "Anniversary".
Techniques used for "ANNIVERSARY"
Perfect Pearls Stencilling Tutorial/ Technique
Alphabet A: Perfect Pearls technique: With help of sponge finger dauber, I applied Pine Needles distress ink through the stencil design. Once the ink was dry, I applied Ranger Perfect medium through the stencil design. Once the design was covered well with Ranger perfect medium, I lifted the stencil away and dusted the design with Ranger Perfect Pearl Perfect Gold. Dusted away any excess perfect pearl and buffed the design with dry cloth to get the shine of perfect pearls.
Stencil on Stencil - Stencilling Tutorial/ Technique
Alphabet N: Stencil on stencil technique: With help of sponge finger dauber, I applied Cinnamon Tea Artistry ink through the stencil design. Once the N design was filled, I placed a texture stencil from Pie lane on top of the N stencil and with help of another sponge finger dauber rubbed Fried Brick distress ink to get the textured look of stencil on stencil technique
Filling design with pen - Stencilling Tutorial/ Technique
Alphabet N: Filling design with pen: I love doodling and so for alphabet "N" I used Sakura Micron 05 light green colour to outline the N. Once the outline was in place, I lifted the stencil and filled the space with diagonal lines :) This is a very simple technique to make gorgeous designs as all you need is some colour pens and the stencil and you can use any patterns to fill in the alphabets.
Additional Tips: You could use Steadler Triplus Fineliner or even your ball point pen for this technique
Pencil colours with thinner Stencilling Tutorial/ Technique
Alphabet I: Pencil colours with thinner: Koh-I-Noor Hardmuth Astra Pencils are my some of favourite pencil colours I have ever owned. There are 6 neon colours in the set and are wax based. I outlined the design using Red Steadler Triplus Fineliner and then coloured using #341173 and #341172. Once the design was filled in, I used a paper stump and Daler Rowney low odour thinner to smooth out the colour to get brilliant effects.
Additional Tips: You could use any other brand of pencils for this technique
Stamping through stencil - Stencilling Tutorial/ Technique
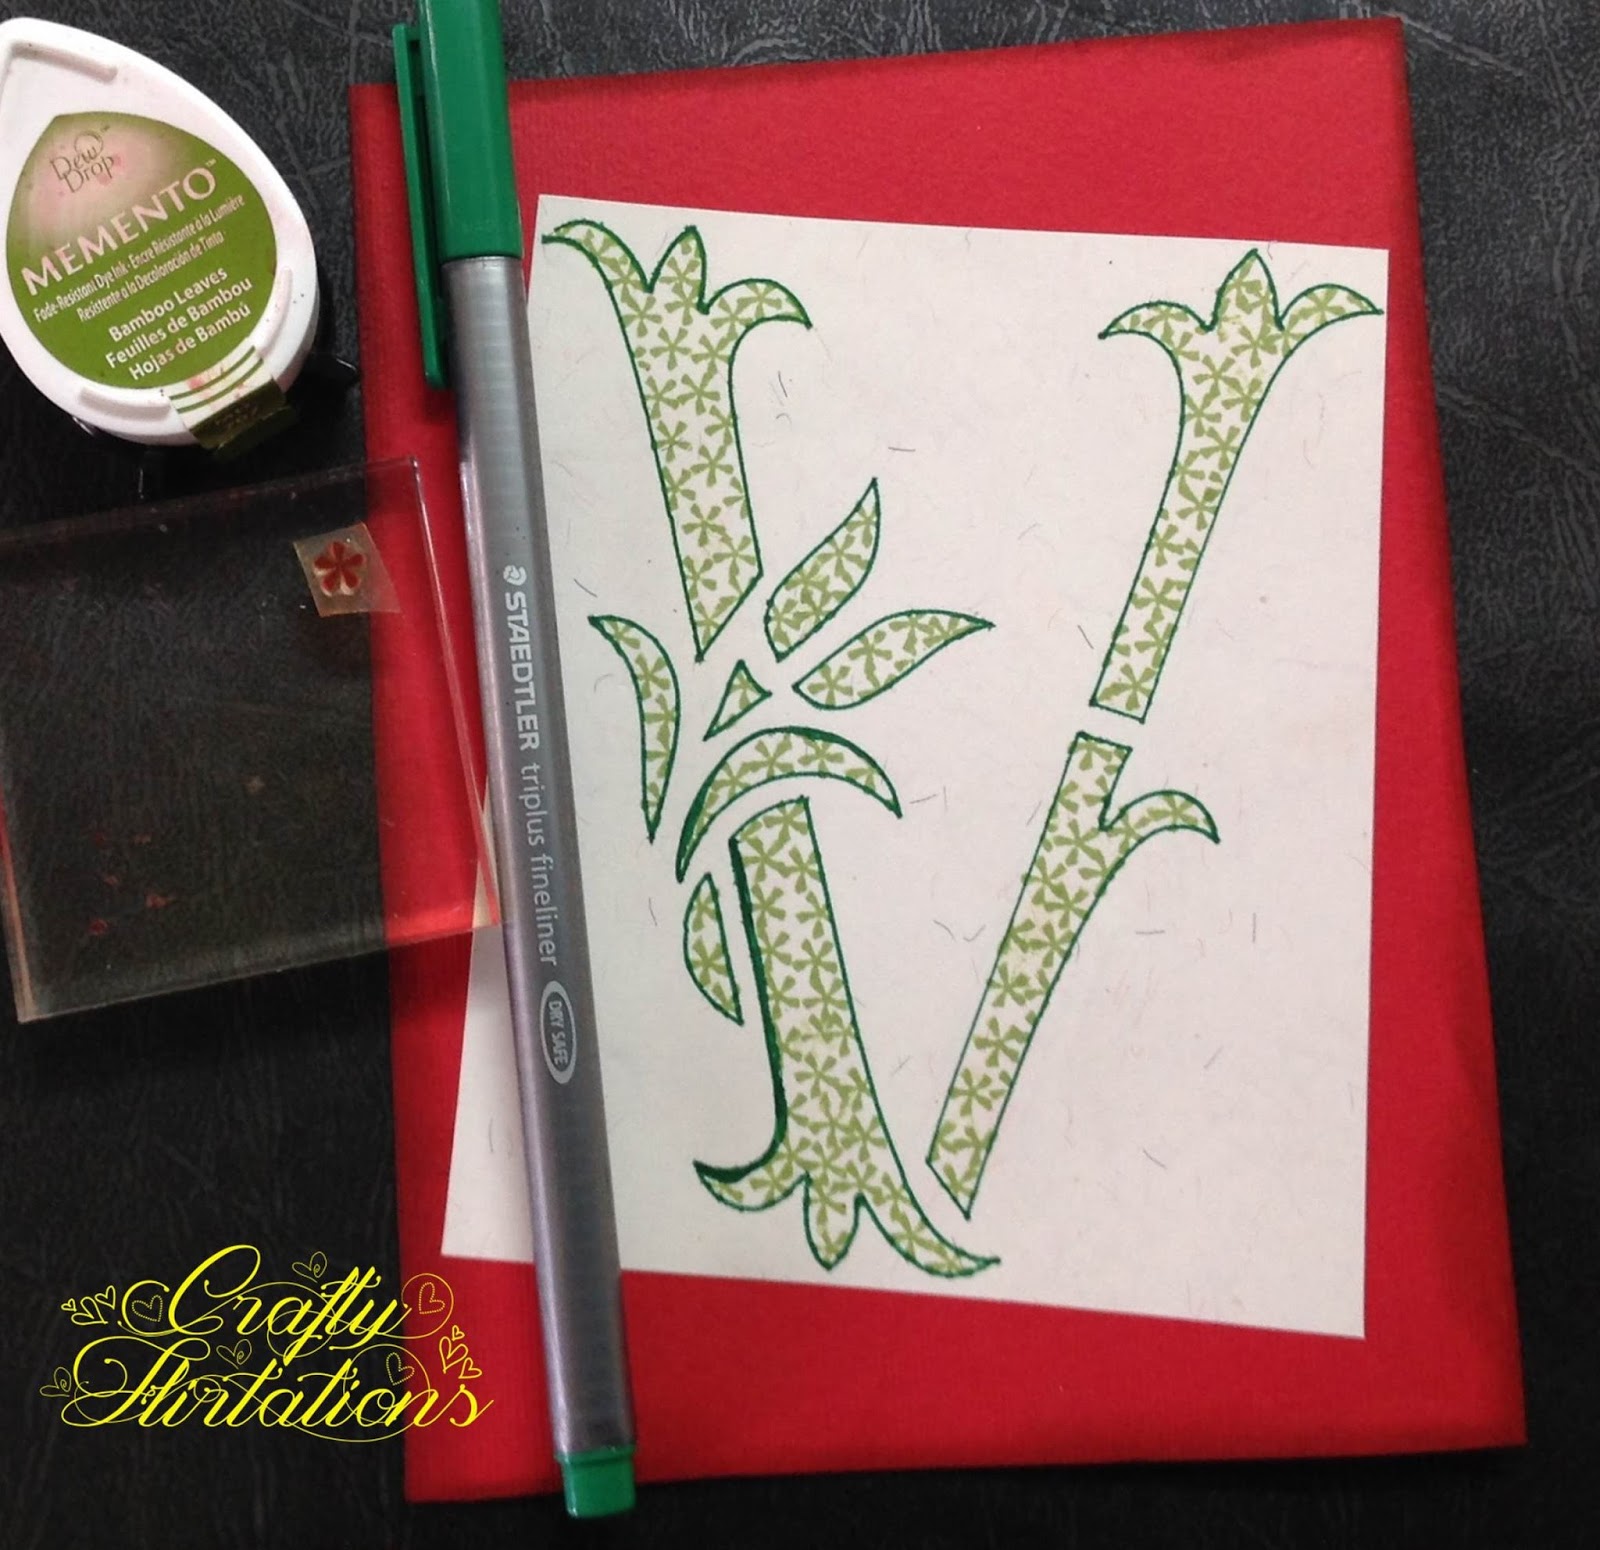
Alphabet V: Stamping through stencil: This is a super fun technique. I outlined the design using Green Steadler Triplus Fineliner and then using a flower stamp from Varna's Love Birds and Momento Bamboos Leaves Ink, stamped through the stencil
Additional Tips: You could use any small design stamps such as circle, hearts, square for this technique. Simple designs work best for this technique
Distressing with stamping - Stencilling Tutorial/ Technique
Alphabet E: Distressing with stamping through stencil: With help of sponge finger dauber, I applied Dried Marigold distress ink through the stencil design. Then using a flower stamp from Varna's Love Birds and Archival Red Geranium ink, stamped through the stencil. Unlike V, the look of alphabet E is completely different and adds texture to the alphabet.
Glitter - Stencilling Tutorial/ Technique
Alphabet R: Glitter with stencil: I outlined the design using Green Steadler Triplus Fineliner. Then I applied a thin coat of glue with help of a brush and sprinkled Green Pie Lane Pixie Dust Fine Glitter to cover the entire design. Once the 1st coat was dry, I applied a second coat of glue and glitter to get a solid R image.
Additional tips:You can colour the alphabet before applying glitter and you wont have to do 2 coats of glitter
Die-cutting with stencil - Stencilling Tutorial/ Technique
Alphabet S: Die-cutting Technique using positives: This technique was suggested by Maninder Kaur of Rainbow Craftykari when I got the stencils from her. I took a pattern paper and outlined the design on the paper on the right side (i.e. the side I wanted on top). Then with the help of Gyro-cut tool, I cut entire stencil and used the positives to make the banner "S".
Additional Tips: Check Part 3 to know how you can use the negatives from this technique too
Shading with Distress/ Artistry Ink - Stencilling Tutorial/ Technique
Alphabet A: Shading With Water based: Love shading with water based inks? They go so well with these alphabet stencils. I shaded the "A" with Pine Needles distress ink and Cracked Pistachio distress ink with help of a finger dauber.
Additional tips: Use finger dauber for this technique as the small circumference of the dauber makes shading easier
Distress ink with distress glitter Stencilling Tutorial/ Technique
Alphabet R: Water based ink with distress glitter: This is an extension of techniques used for "A". I shaded the "I" with Orange Popsicle Artistry ink and fried brick distress ink with help of a finger dauber. Then I applied some glossy accent randomly and sprinkled distress glitter to get the gorgeous shine
Inka Gold Stencilling Tutorial/ Technique
Alphabet Y: Inka Gold Technique:Viva Decor’s Inka Gold is a revolutionary product that produces an amazing metallic finish without any toxic chemicals as it has beeswax as its core ingredient. With help of a sponge I applied Inka Gold Jade through the stencil design to get this gorgeous shiny green Y.
Hope you have enjoyed Part 2 of the stencilling techniques. Continue to read Part 3 to read about stencilling techniques used to create initials AJ and how we put the banner together.
The one thing that binds the crafting community together is the love for beautiful craft supplies and the unsaid wish to own each and every craft tool out there. This post is about one such craft tool that I had been waiting to own since last 6 months. Yes. You heard it right 6 months. In October 2015 Maninder Kaur of Rainbow Craftykari had opened a pre-order of an Indian Brand Pie Lane and when she shared the brochure for Pie Lane with me, I went crazy for the brilliant stencil designs that were pocket friendly. The brochure had these beautiful A6 size Alphabet stencil designs that stole my heart away the moment I saw them. However, when I placed my order, I got to know that Pie Lane had delayed launch of the alphabet stencils for some time. Ever since then, I have asked Maninder every alternate month if Pie Lane Alphabet Stencils were coming out & the craft gods showered their love on me finally in last week of May 2016 and Maninder finally gave me the food news that the alphabet stencils were finally coming out :) Check the gorgeous designs below, I am sure you would love them :)
As soon as I knew I was getting these gorgeous stencils, I knew what was my 1st project going to be using these stencils :) A "Happy Anniversary" banner for my sister in law's 1st anniversary.
Happy Anniversary AJ
There are endless possibilities of using these stencils and I was very eager to try out different styles and so I ended up using 17 different technique - yes different technique for each of the alphabets of "Happy Anniversary" + 1 technique for initials of the couples name "Abhishek & Jaya". I used a smooth but self designed (to resemble hand made paper) off white to make all the alphabets
In this 1st part, I am sharing the techniques used for "Happy" In Part 2, I have shared the techniques used in word "Anniversary". In Part 3, I have shared the technique used for the initials "AJ" and how we brought the banner together.
Techniques used for "HAPPY"
Filling in the design directly - Stencilling Tutorial/ Technique
Alphabet H: Filling in the design directly: The most simple technique- fill it in with a pen or pencil. I used Gelly Roll Moonlight 10 - Fluo Orange Pen (XPGB#405) to make alphabet "H". Outline the design with the Gelly roll pen and lift the stencil away before filling in the colour. The Gelly roll pens take time to dry and if you do not lift the stencil before filling in the colour and if the stencil moves even a little, your design can get ruined. So just outline the design, lift away the stencil and fill in the colour. Once I had the H ready, I felt it needed some red, and so I outlined the entire alphabet using Red Steadler Triplus fineliner
Additional Tips: You can use any pen or pencil or crayons for this technique. Each medium will leave you with a different texture
Water Colour Stencilling Tutorial/ Technique
Alphabet A: Watercolour Technique: I Love water colours and so used the same for alphabet A. Using a 01 Black Sakura Micro, I traced the design "A". I used Sakura Micron Pen for outline as they are waterproof . Then I lifted the stencil and water coloured it using 2 shades of green from Sakura 24 colour water colour pen set (Pen number #27 & #29)
Additional Tip: You could any other water colour medium such as your distress or artistry inks, water colour cakes, peerless water colour sheet or Faber Castell Gelatos
Ink Spray Stencilling Tutorial/ Technique
Alphabet P: Use Ink Spray technique: This was the most trickiest technique of the 17 techniques. I used Fried brick distress ink and with help of a blending tool, I filled the space through stencil to get a solid "P" design. Thereafter, without lifting the stencil, I gave 3-4 light spray of Hampton Art Ascents Scented Spray Ink "Cinnamon" from a distance of 12-14 inches and immediately, but carefully lifted the stencil away. Once the spray was dried, I outlined it using the Steadler Triplus Red Fine liner. After the design had dried, I wanted some more shine apart from the shine from the spray and so I added Pie Lane glitter ball number 18 with some glue on the design
Additional Tips: Do not spray from a very close distance as the ink can bleed through the design. You can use "Cosmic Shimmer Mists" or "Dylusions Ink Sprays" or any other ink sprays. You could also directly spray through the design without giving a distress background.
Texture Paste Stencilling Tutorial/ Technique
Alphabet P: Texture paste technique: Texture paste and stencils are a match made in heaven. For alphabet P, I took some Ranger texture paste on my craft mat with help of a plastic spatula and mixed it with Cosmic Shimmer Mist "Meadow Lush" to get the beautiful green colour. Once I had the right colour texture paste ready, I applied the same with help of spatula through my stencil design to get the gorgeous green P
Additional Tips: Its always nice when making coloured texture paste to have 2-3 projects handy to avoid wastage. Also, you can use distress re-inkers or acrylic colours to add colour to your texture paste
Embossing powder Stencilling Tutorial/ Technique
Alphabet Y: Embossing powder technique: All crafters love embossing powder. So, with help of a sponge finger dauber, I applied Ranger Perfect medium (you can use any embossing ink) through the stencil design. Once the design was covered well with Ranger perfect medium, I lifted the stencil away and sprinkled "WOW Apple Red" Embossing powder and heat set it with a heat gun. I love the bright and shinny look of how Y turned out
Hope you have enjoyed Part 1 of the stencilling techniques. Continue to Part 2, to read about stencilling techniques used to create "Anniversary" and Part 3, to read about stencilling techniques used to create initials AJ and how we put the banner together.