Showing posts with label Card. Show all posts

Monday, May 21, 2018

A Feathery Great Day

Hey Friends,

I am back with a neat and clean card today.


Supplies:
  • iCraft Floral Natura card stock 
  • Die Versions A Great Day die
  • Spellbinders Die - Feathers
  • Ranger Distress Oxide Ink: Spiced Marmalade
  • Ranger Distress Ink: Candied Apple
  • Nuvo Mousse Fresh Copper
  • Foam tape, glue, water mister, heat gun 
Steps to create:

  • Cut and score Natura paper to create 4.5 by 5.25" side folding card base.
  • Smoosh Distress ink and Oxide ink on craft mat, mist with water, place white card stock on the ink to colour it and dry using heat gun. Repeat the layer till desired colour is achieved. 
  • Once the desired colour is achieved, die cut "A Great Day" and some feathers from it.
  • Die cut 2 "A great day" sentiment from white card stock and stack and adhere on top of each other. Adhere the coloured "a great day" on top of stacked white die cut.
  • Adhere the sentiment to card base using glue. 
  • Rub & buff some Nuvo mousse on feathers. Arrange and adhere feathers on card base to finish the card (adhere 2 feathers using foam tape for added dimension). 
Hope you liked this card.

Love,
Dr. Neha Sanwalka Rungta
Crafty Flirtations 

Monday, May 14, 2018

Quick card using Mayura Collection Paper

Hi Friends,

The Craft Studio launched their 1st paper pack "Mayura Collection" under their brand name "iCraft" a few weeks back. Dinesh & Forum very kindly sent me a complementary pack of the papers to try. 

About Mayura Collection:
  • This pack comes in 12 by 12" size
  • Has 30 printed sheet
  • 4 of these sheets are UV Embossed, Textured Embossed, Foiled and Matt laminated
  • The pack also includes 4 motif sheets, 1 sheet of quotes and 1 envelope template 
  • They are ideal for making cards & Scrapbooks
The motif and quotes sheet make it so ease to whip up cards in no time. Sharing with you a card that I made in less than half an hour (only cause it involved fussy cutting). 


    Supplies:
    • iCraft Floral Natura Paper
    • iCraft Mayura Collection Pattern paper
    • Scissor, foam tape, glue, embossing tool 

    Steps to create:
    • Cut and score Natura paper to create 4.5 by 5.25" top folding card base.
    • Cut one of the pattern papers to 4.25 by 5" size and adhere on top of card base with glue. 
    • Fussy cut 2 floral motifs from motif sheet. Shape one of them using embossing tool and adhere on top of the other using foam tape for dimension.
    • To finish the card, adhere the motif (using glue) & quote (using foam tape) on the prepared card base.  
    Hope you like this quick card.

    Love, 
    Dr. Neha Sanwalka Rungta
    Crafty Flirtations 

    Monday, December 18, 2017

    Quick & Simple Christmas Cards

    Hi Friends,

    As crafters, we often get presented with opportunities where we can bring that extra smile & happiness to some.  I recently visited an old-age home in my vicinity that presented me with one such opportunity. As Christmas is around the corner, along with my friends, I decided to make & donate some Christmas cards for the elderly at old-age home. I didnt have any Christmas themed supplies, so I dug through my stash to create these beautiful cards


    Materials Used:

    • Ranger Distress Oxide Ink: Candied Apple
    • Art Anthology Dimensional Paint: Brick (stone effect), Emerald (Gem Stone) 
    • Ranger Red Geranium Archival Ink 
    • iCraft Rose stencil
    • Unity Sentiment Stamp
    • Sequins from Mudra & Papericious
    • Wink Of Stella 
    • White Card stock, Acetate Sheet & Glue

    Steps To Create:

    • Make a triangle stencil from an acetate sheet.
    • Cut and score card stock to create a 4 by 6" told folding card.
    • Place the rose stencil on the card and over-lay a triangle stencil on it.
    • Either blend Distress Oxide ink on the card or apply a layer of dimensional paint through the stencil to resemble a Christmas tree.
    • If using Distress Oxide Ink, once the ink is dry, paint over using Wink Of Stella to add Shimmer.
    • Stamp the sentiment using Archival ink.
    • To finish the card, add some sequins on the card to resemble ornaments.

    Hope you are inspired to dig through your stash to create cards. 

    Love,
    Dr. Neha Sanwalka Rungta 

    Thursday, June 29, 2017

    Stamping with Distress Oxide Inks

    Hi Friends,

    I am back with another card today using Ranger Distress Oxide Inks. Oxide inks are absolutely fantastic for stamping. However, one must remember that these inks stay wet for a long duration so one should not touch the stamped image till the ink drys to avoid smudging. Heat tool can also be used to speed drying process. Hope you like the card.


    Best Regards,
    Dr. Neha Sanwalka
    Crafty Flirtations 

    Thursday, June 22, 2017

    Stamping on coloured card stock with Oxides

    Hi Friends,

    Today I am sharing another card made using Ranger Distress Oxide Inks. As Distress Oxide inks are a blend of pigment and dye ink, they work great for stamping & what's more fantastic is that they can be used for stamping on coloured card stock too.


    Supply List:
    • Blue textured card stock
    • White Iris Card stock 270 gsm
    • Ranger Distress Oxides: Worn Lipstick, Peeled Paint & Broken China 
    • Glossy Accent
    • Hero Arts Cling Stamp - Scattering Leaves 
    • Lawn Fawn Summer Time Charm Stamp 

    Hope you all love the card.

    Love,
    Dr. Neha Sanwalka
    Crafty Flirtations 

    Wednesday, June 21, 2017

    Distress Oxide Cards

    Hi friends,

    Ever since I brought Ranger Distress Oxide inks, I have fallen in love with them. I have tried various techniques with them and one of the techniques that I enjoyed trying was by by "Stamp N Ground Crafts By Echo Noble". Here is my try with the technique.


    Hope you all like the cards.

    Love,
    Dr. Neha Sanwalka Rungta
    Crafty Flirtations 

    Wednesday, May 31, 2017

    Cards For Cause - Soldier Drive - May 2017

    Hi Friends,

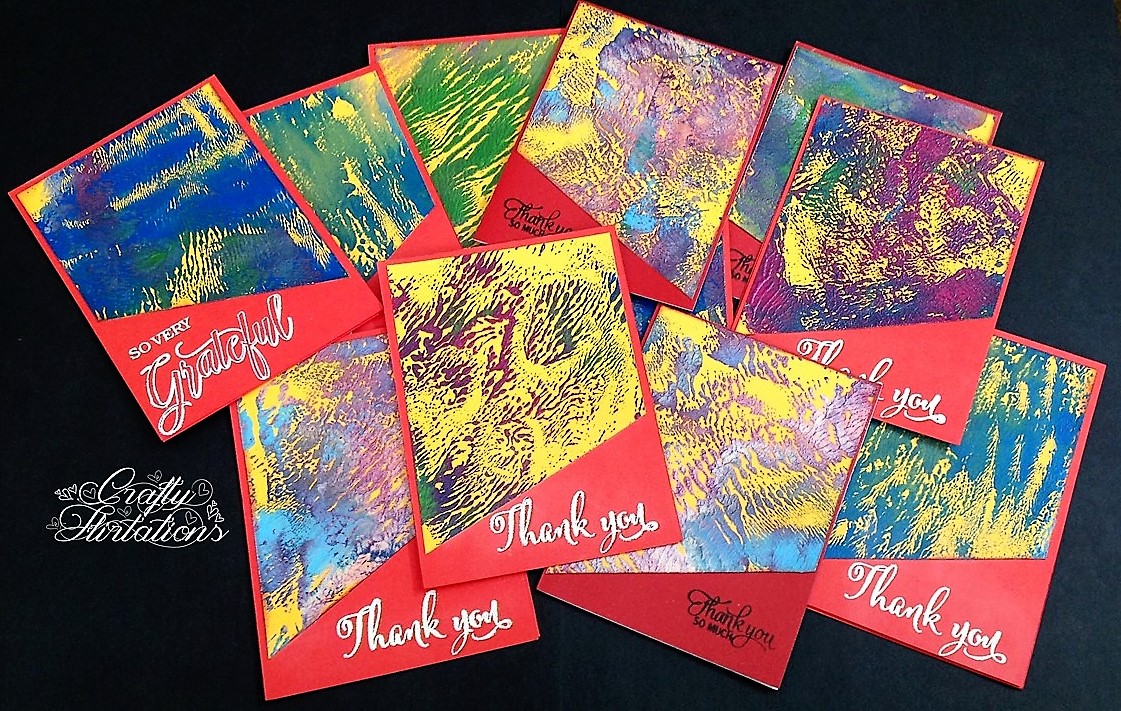
    After the last soldier drive during last Diwali, I have been wanting to repeat the drive and send out more cards to Soldiers who take care of our country. So, I undertook another Cards for Cause - Soldier Drive on a personal level and set along to make cards for our brave soldiers. 2 of my Facebook friends Halak Shah & Tanvi Shah also contributed cards to this drive. When I started making cards for the drive, I realised I didnt have any Thank You or Gratitude Stamps. Before I searched online, I asked Varshitha Nagarajan of Mudra Stamps if she had any Thank you or gratitude sentiment stamps . When she got to know what I had set on to do, she very kindly sent me 2 gorgeous stamps from Mudra as her contribution for this drive. Thank you so much Halak, Tanvi & Varshitha for contributing to this drive along with me. The smile on the face of soldiers was priceless.  


    Now as I have confirmation that the cards have reached their destination, I am sharing various cards (a total of 128) I made for this drive. The sentiment stamps used as exclusively from Mudra [or from Varna (Mudra was Varna before)] as I wanted to honour Varshitha's contribution towards the drive. I have used various techniques like dendritic mono- printing, stencilling, ink blending with Ranger Distress Oxide inks, Backgrounds with dimensional paints, using pattern paper etc. 


    If you would like to participate in future Cards For Cause Drive With Me, Please drop your mail id below.

    Hope you like these cards.

    With love,
    Dr. Neha Sanwalka Rungta 

    Monday, November 21, 2016

    Heat Embossed Card For A Loved One

    Hi Friends,

    So today I am sharing a very special card with you all. I celebrated my 3rd anniversary on 19th and this is the card I made for my dear hubby on our anniversary. So Jitesh's favourite color is purple and hence I choose a purple card stock as the base of my card.


    Materials:
    • White & Purple Cards tock
    • So Suzy Peony & Line Flower Stamps  (So Suzy Stamps can be brought in India from Rainbow Craftykari
    • Technique Tuesday Incredible Stamp
    • Peek-a-boo Bold Hugs & Love Stamp
    • VersaMark Watermark Ink pad
    • WOW gold glitter embossing powder
    • Double Sided Tape
    • Ranger Heat Gun
    Method:

    • Cut the purple card stock to size 
    • Stamp So Suzy Peony & Line Flower stamps with help of VersaMark Watermark Ink
    • Sprinkle embossing powder to cover the entire area properly and heat emboss with heat gun
    • Repeat the stamping and embossing process for the sentiment with help of Technique Tuesday & Peek-a-boo stamps on a small piece of purple card stock and cut to size
    • To bring out the sentiment, swipe the edge of sentiment piece in the VersaMark Ink pad and repeat the heat embossing process with same WOW Gold Glitter powder 
    • Adhere sentiment on top of the card base with thick double sided tape 
    • Adhere the ready Purple card base to a white cardstock to finish off the card

    Hope you liked the simple & elegnat card which is very special to me :)

    Love,
    Dr. Neha Sanwalka
    Crafty Flirtations 


    Friday, September 30, 2016

    Cards for a Cause - Soldier Drive

    Hi friends,

                 This is a very special post. There is a Facebook group called "Cards For A Cause - India" and they recently announced a drive to send "Thank you" or "Diwali" Cards to Indian Soldiers posted in different Battalions. I got to know about the group & this drive through a broadcast message from Neha Gala who is going to put all cards together and mail them to Hall of Fame, Leh from where the cards would be dispatched to soldiers. 

              So as soon as I heard of the drive, I knew I had to contribute cards for this noble cause of thanking our soldiers who selflessly serve our country & protect us. I made a total of 58 cards for the drive. Stencilling, pattern papers, stamping, distress inking & Zentangle were mainly used to create these thank you cards. I also added a small "Thank You" note inside the card in Hindi for our soldiers

    प्यारे सैनिक,  भारत देश के लिए आपकी नि: स्वार्थ सेवा के लिए बहुत धन्यवाद। हमें दुश्मन से बचाने के लिए बहुत बहुत धन्यवाद। आप हमारे देश सच्चे नायक हैं।  आपकॊ दीपावली की हार्दिक शुभकामनाएं।

    It means: Dear Soldier, Thank you for your selfless service for India. Thank you so much for protecting us from the enemy. You are the true hero of our nation. Wish you a very Happy Diwali


    Zentangle cards: 


    Sentiment Stencilling With Helix stencils


    Motif Stencilling With Sakura Gelly Roll Pens & Pie Lane Stencils


    Stencilling With Texture Paste  & Pie Lane Stencils


    Cards With Pattern Papers 


    Stamping & Background Work & Water Colouring With Distress Ink or Alcohol Inks


    This is my small little contribution for the noble drive. I hope to contribute to more such drives in future.

    With Love,
    Dr. Neha Sanwalka,
    Crafty Flirtations 


    Tuesday, May 17, 2016

    Monochromatic Stamping With Embossing Card

    Hello all,

    You know destiny wants you to make cards when you watch a video on Monochromatic Stamping by Jennifer McGuire and at the same time you receive free samples of some gorgeous card stock from the beautiful and lovely Maninder Kaur of Rainbow Craftykari :)

    So I got this beautiful sample of "Lightly Textured Coloured Card Stock" in red, blue and orange. So despite statistical analysis (what I do professionally), I had to steal time away to make some cards :)

    Lightly Textured Coloured Card stock
    The card stock has light chequered texture on one side and fairly smooth (though not completely) on the other. To highlight the two sides of the card, I have created 4 different cards (2 red and 2 blue) by stamping on both sides of the card-stock.

    Red Card Base: 

    I stamped the the solid flower from Prima "Ink N Layer" glorious flora using archival carnation red ink pad on the red card-stock. For the 2nd layer of stamping, I used Versamark ink pad and Zing clear embossing powder and heat set the image. In the images below, you can see the difference in the texture of stamping on the 2 sides of the card stock

    Chequered Side and the stamping is chequered too


    Smooth side and smooth stamping 


    Blue Card Base: 

    I stamped the the solid flower from Prima "Ink N Layer" glorious flora using archival cobalt blue ink pad on the red card-stock. This time for  the 2nd layer of stamping, I used Versamark ink pad and Zing white embossing powder and heat set the image. Like in red card base, in the images below, you can see the difference in the texture of stamping on the 2 sides of the card stock

    Chequered Side and the stamping is chequered too

    Smooth side and smooth stamping 

    I personally loved both the effects, especially the chequered side as it adds a lot of depth to the card  base :)

    To finish off the card:

    I adhered the card bases created above on white card stock with help of red-tacky tape. For sentiment, I used Kaisercraft Wishes Mini Stamp and stamped "Best Wishes" on Vellum using "Archival Black Ink Pad". Using glue I adhered the vellum on the card-stock by applying very small glue dots behind the stamped area :)


    Hope you liked the cards and my take on the card :) If you like, you could order the cards stock by contacting Maninder Kaur or from Rainbow Craftykari  I have listed the complete supply of products used to make the cards below :)

    List of Supplies Used:

    • Prima Ink N Layer glorious flora  Stamp
    • Kaisercraft Wishes Mini Stamp
    • Red lightly textured coloured card stock 
    • Blue lightly textured coloured card stock  
    • Archival Carnation Red Ink Pad
    • Archival Cobalt Blue Ink Pad
    • Archival Black Ink Pad
    • Versamark Ink Pad
    • Zing Clear Embossing Powder
    • Zing White Embossing Powder
    • Acrylic Block
    • Stamping Foam 
    • Ranger Heat Gun
    • White Card Stock
    • Vellum
    • Red-tacky tape
    • Fevicryl glue 


    Thanks for stopping by.

    Love,
    Dr. Neha Sanwalka
    Crafty Flirtations :)