Thursday, April 12, 2018

Beautiful Aquatic Flora and Fauna

Hi,

I am here today with a very special project that is very close to my heart as this is my 1st try with air dry clay and I am super happy with the outcome. All the floral and fauna are handmade without using any moulds and are super easy to make.


Materials Used For Flora & Fauna:
  • Daisy Air Dry Clay
  • Embossing Tools & Carving Tools 
  • Ranger Dylusions Paint - After Mid Night
  • Ranger Dylusion Paint - Dirty Martini
  • Prima Art Alchemy Finnabair Acylic Paint - Metallic Silver Spoon
  • Prima Art Alchemy Finnabair Acylic Paint - Metallic Ancient Coin
  • Fevicryl Acrylic Paint - Pearl Silver Metallic 351
  • Fevicryl Acrylic Paint - Sparkling Pearl Golden Yellow 907
  • Fevicryl Acrylic Paint - Pearl Orange 317
  • Fevicryl Acrylic Paint - Sky Blue 63
  • Fevicryl Acrylic Paint Orange 17
  • Fevicryl Acrylic Paint Sparkling Pear Golden Green 911 
  • Inka - Gold Jade Green
  • Nuvo Embellishment Mousse - Fresh Copper 
Materials Used For Background:
  • A4 size wooden ply or can use a flat back canvas
  • Price tags & thread strings to add texture (Inspired by videos from Maremi Small Art by Marta Łapkowska)
  • Itsy Bitsy Little Birdie 2 in 1 paste 
  • Lindy's Starburst Spray - Hydrangea Blue
  • Lindy's Starburst Spray - Tiffany Blue
  • Cosmic Shimmer Spray - Meadow Lush 
  • Ranger Distress Oxide Ink - Spiced Marmalade 
  • Ranger Texture Paste
  • Pie Lane wave stencil 
  • Ranger Distress Glaze
  • Icraft Clear drops 
For Sentiment:
  • Concord & 9th Perfectly Penned Stamp Set 
  • Ranger Archival Black Ink
  • Ranger Glossy Accents
  • White Cardstock 
General Supplies:
  • Ranger Dina Wakley Gel Medium
  • Ranger Glossy Accents
  • Paint Brush 
  • Pallet Knife
  • Glue gun

Steps to create:

Though its difficult to explain the process of making this layout, I have tried to describe it in short:

Flora & Fauna:
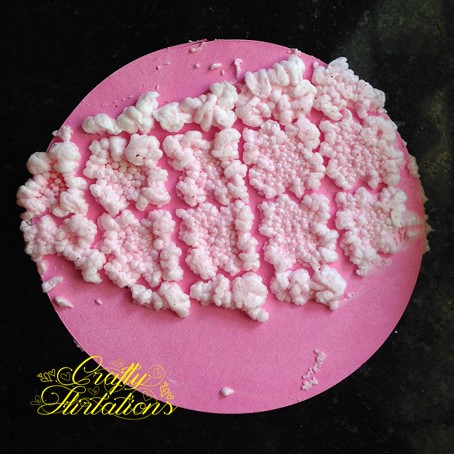
  • Make all the flora and fauna using air dry clay by manually shaping the clay (no fancy moulds needed) and let it dry for 24 hours before colouring. Use some embossing tools and carving tools to add texture to clay pieces. (The Octopus was inspired from the video tutorial from Gabrielle Pollacco).
  • Paint the flora and fauna with your favorite colours. Once dry, apply Nuvo Mousse or Inka Gold to highlight the texture.
  • Tip: To avoid Acrylic Paint from chipping once dry, mix some Gel medium to the paints before coloring to make them permanent.

Background:
  • Adhere some price tags and thread strings on ply with help of gel medium. 
  • Thin some 2 in 1 paste and apply on the entire background as gesso. 
  • Once dry, colour using spray inks. Once the inks are dry, smoosh Oxide ink on different spots to balance the colours of the flora & fauna.
  • Splatter some of the spray ink using brush. 
  • Seal the background using Distress Glaze.
  • Apply texture paste through stencils on various parts.

Putting it together:
  • Adhere the flora and fauna to the background with help of glue gun.
  • Stamp the sentiment on cardstock and adhere to background using glue.
  • Add Glossy Accent on the sentiments.
  • To finish, adhere  clear drops using Glossy Accents.
Hope you all love the layout as much as I love it. If you do like it, please leave some love in the comments below. 

Love,
Dr. Neha Sanwalka Rungta
Crafty Flirtations 

Monday, April 9, 2018

Itsy Bitsy Little Birdie Embossing Texture Paste - Product Review

Hi Folks,

I am here with a review of Itsy Bitsy's Little Birdie's Embossing Texture Paste. Itsy Bitsy launched this paste in February 2018 during the opening of their 2nd Mumbai Store. When Rashmi Harish, owner of Itsy Bitsy showed me swatch of the Embossing Texture Paste, I knew I had to buy one.

About Embossing Texture Paste:

  • Comes in 12 amazing colours. 
  • Can be applied on various surface such as paper, metal, wood, glass etc. using a palette knife. 
  • Once you have applied the texture paste, you need to heat set it to get the crazy amazing texture. 
  • It's water resistant when dry but not washable. 
  • On heat setting, it dries to matt finish. 

Off the 12 colours, I brought the Frosty Fizz Embossing Texture Paste and here are the swatches I created to test the various effects with different mediums before I could incorporate in my project.


I applied Embossing Texture Paste through a stencil on Kraft Card-stock and heat set it. I absolutely love the bubbly matt finish of the paste. Would add amazing texture on any mixed media project . The more you heat the paste, the more bubbles it creates. A thicker layer of paste would give you bigger bubbles as compared to thin layer of paste (P.S. the small red dots are that of pixie red glitter that were on my stencil & got incorporate in the design).


After heat setting the Embossing Texture Paste on white Card stock, I sprayed it with Lindy's Starburst Spray Hydrangea Blue. It produced a fun shaded effect.


I blended some Distress Oxide Picked Raspberry Ink on Card stock and applied Embossing Texture Paste over it through a stencil. As Oxide inks are water reactive and stay wet longer, the paste absorbed some ink and on heat setting I got a pretty pink and white textured effect. 


I blended some Distress Ink Picked Raspberry on Card stock and applied Embossing Texture Paste over it through a stencil. Distress Inks are water reactive but dry quickly as compared to Oxides and the absorption of Ink was lesser by the paste in this case.


After Heat setting the Embossing Texture Paste on card stock blended with Picked Raspberry Distress Oxide Ink, I applied some Wilted Violet Distress Oxide Ink and sprayed it with water. The paste absorbed some of the pigment from the ink and gave an amazing purple look.


Similar effects were achieved when I applied Candied Apple Distress Ink on heat set paste and sprayed with water. Similar effect can be achieved with any dye inks. 


My Verdict:
  • The Embossing Texture Paste is a must for all Mixed-Media artists.
  • Adds amazing texture to projects. 
  • Absorbs inks from the background if the background inks are water reactive
  • If you want to retain the colour of your Embossing Texture Paste when applied on water reactive ink blended backgrounds, seal the background with mediums such as Distress Glaze or Gel Medium before applying the paste. 
  • Stains or absorbs pigments when applied on top after heat setting. 
  • At Rs. 249/- its absolutely worth the money. I am soon going to buy the rest of the shades for my mixed-media adventures. 
I had absolute fun using this product. Will soon share a Mixed-Media project where I used Embossing Texture Paste.

Hope you find the review helpful. 

Love, 
Dr. Neha Sanwalka Rungta
Crafty Flirtations 

(Disclaimer: I am not affiliated with Itsy Bitsy or Little Birdie nor have I been paid to write this review. This review is purely my personal opinion based on my experience of using this product) 


Friday, January 19, 2018

Gears & Sweet Memories - A Mixed-media layout

Hi friends,

I am sharing today a mixed-media layout with a vintage feel that I made for my sister-in-law sometime back. As I wanted a gender neutral project, I used MDF gears to embellish my project.


 The MDF gears are from iCraft by The Craft Studio. iCraft has one of the widest range of gears and lots of other designs in MDF cut-outs with appropriate thickness and clean cuts for any mixed-media project. 


For the base, I coloured a 12 by 12 MDF with Wild Honey Distress Ink in the edges and sealed the ink using Distress glaze. I than tore a pattern paper on edges to give a distressed look and gave it a wash with diluted purple and blue. Once the paint was dry, I adhered pattern paper to coloured MDF base. I added some texture using Ranger texture paste and stencils


I mixed black Fevicryl acrylic paint with Ranger texture paint and used it through Tim Holtz stencil to add texture at places. I also dusted some Perfect Pearls on the textured areas to add the gold touch. 


I used gold, silver, blue and purple Fevicryl acrylic paints to colour the gears.  


This is a metal embellishment that I coloured using similar acrylic colours as MDF. I cut the clock from a pattern paper and pasted it on center of the embellishment. I added some micro-beads and Mod-Podge dimensional to finish it.


Sweet Memories is also an MDF from iCraft and it was heat embossed with Ultra Thick Embossing Powder from Ranger 

I hope you liked this layout.

Love,
Dr. Neha Sanwalka Rungta
Crafty Flirtations 

Wednesday, January 17, 2018

Your Love Gives Me Wings To Fly

Hello Friends,

It's almost a month to go for Valentine's day, but we all start making cards & gift items early. So here, I am sharing with you a frugal mixed-media layout for Valentine's  gitf.


  • I wrapped some laces I had at home around a 3 by 8" piece of plywood (scrap piece of plywood).
  • Apply a coat of Gesso. Once the Gesso was dry, I coloured the background using spray paints I made at home (You can find numerous frugal recipes on YouTube).
  • For the focal point, I cut a heart from a red card stock and applied red glitter on it using glue.
  • I drew wings on vellum using Ranger Emboss It pen and heat embossed it using White Embossing powder. Then I fussy cut the wings.
  • I stamped sentiments on white card stock and applied a coat of Glossy Accent on them.
  • To finish the piece, I adhered wings, heart and sentiment on the coloured ply using Glossy Accent. 
Hope you enjoyed this quick & frugal Valentine's gift.

Love, 
Dr. Neha Sanwalka Rungta
Crafty Flirtations 


Tuesday, January 16, 2018

Doodled ATCs

Hi friends,

Hope 2018 has been going great for you. I am sharing some ATCs I made with doodling sometime back. Hope you like them.


  • Blend Distress ink on 2.5 by 3.5" card stock. 
  • Draw circles of various size on card stock using Sakura Micron and fill them using Sakura Gelli Roll pens.
  • Add highlights to circles.
  • To finish, apply a thin coat Glossy Accent on the edge and sprinkle with glitter. Adhere stamped sentiment using double sided foam tape.

  • Blend Distress Ink in Shades of blue on 2.5 by 3.5" card stock and stamp some pine trees on top using Archival Inks.
  • Stamp some Pine trees on a card stock and fussy cut. 
  • Draw a tortoise on card stock and doodle using various patterns and fussy cut. 
  • Create a slider system on the inked and stamped panel and cover the base using Dress My Craft Frosted Sugar (I used Glossy Accent to adhere Frosted Sugar).
  • Adhere the tortoise on it using home made slider system. 
  • Add a card stock at back and fussy cut pine trees on top. Add some Dress My Craft Frosted Sugar on the Pine trees.
  • To finish the ATC, adhere sentiment (handwritten) using double sided foam tape.


  • Doodle a feather design using Sakura Micron on yellow card stock.
  • Write the sentiment with help of a stencil & Sakura Micron to finish the ATC.


  • Doodle a floral design using various Sakura Gelli Roll pens on black card stock,
  • To finish the ATC, write a sentiment also using Sakura Gelli Roll Pen.


Hope you like these ATC with Doodling.

Love,
Dr. Neha Sanwalka Rungta
Crafty Flirtations 

Friday, January 5, 2018

Rocky Roads Art Journal

Hi Friends,

Happy New Year to all of you. In my 1st blog of 2018, I am sharing an Art Journal Spread with a total of 7 supplies (Apart from basic supplies). I absolutely love the quote "Difficult roads often lead to beautiful destination" as its such a huge motivation and confidence booster and this Art Journal Spread is all about it.


Supplies Used:

  • iCraft Stencil (rock/ stone stencil)
  • Ranger Distress Ink: Picked Raspberry
  • iCraft MDF Phrase 
  • Sakura White Gelli Roll Pen 
  • Sakura Black Brush Pen
  • Ranger Gold Embossing Powder 
  • VersaMark Embossing Inkpad 
  • Basic Supplies: Blending Tool, Heat Gun, Glue
Steps to Create: 
  • Ink the MDF phrase with VersaMark Ink and heat set with Gold embossing powder.
  • On your art journal, blend Distress Ink with help of a blending tool through a stencil.
  • Once you have stencilled on the entire page, colour the negative space using a brush marker or any black pen that is water proof.
  • Once the ink is dry, flicker some water to reactivate Distress Ink and create texture.
  • Outline each stone using white Gelli Roll pen.
  • Adhere the embossed MDF phrase to finish the page. 
Additional Tips
As this was a 4 by 8 stencil, there were a few harsh lines where ever the stencil ended. I connected some Inked rocks with help of paint brush & Ink to remove harsh end-lines of stencils and make the page look more generic 


I hope you like my simple page, yet quirky Art Journal Page.

Love,
Dr. Neha Sanwalka Rungta 

Monday, December 18, 2017

Quick & Simple Christmas Cards

Hi Friends,

As crafters, we often get presented with opportunities where we can bring that extra smile & happiness to some.  I recently visited an old-age home in my vicinity that presented me with one such opportunity. As Christmas is around the corner, along with my friends, I decided to make & donate some Christmas cards for the elderly at old-age home. I didnt have any Christmas themed supplies, so I dug through my stash to create these beautiful cards


Materials Used:

  • Ranger Distress Oxide Ink: Candied Apple
  • Art Anthology Dimensional Paint: Brick (stone effect), Emerald (Gem Stone) 
  • Ranger Red Geranium Archival Ink 
  • iCraft Rose stencil
  • Unity Sentiment Stamp
  • Sequins from Mudra & Papericious
  • Wink Of Stella 
  • White Card stock, Acetate Sheet & Glue

Steps To Create:

  • Make a triangle stencil from an acetate sheet.
  • Cut and score card stock to create a 4 by 6" told folding card.
  • Place the rose stencil on the card and over-lay a triangle stencil on it.
  • Either blend Distress Oxide ink on the card or apply a layer of dimensional paint through the stencil to resemble a Christmas tree.
  • If using Distress Oxide Ink, once the ink is dry, paint over using Wink Of Stella to add Shimmer.
  • Stamp the sentiment using Archival ink.
  • To finish the card, add some sequins on the card to resemble ornaments.

Hope you are inspired to dig through your stash to create cards. 

Love,
Dr. Neha Sanwalka Rungta 

Saturday, December 16, 2017

It's The Seasons To Be Jolly - Art Journal

Hi Friends,

Art journal for me is not just a way of expressing my thoughts, feelings, moods but its also about trying different techniques that I have been meaning to try for a long time. As Christmas is around the corner, I made an art journal page with Ornaments as my focal points and used a few different techniques to create my focal points.


Supplies used:
  • Ranger Distress Ink: Cracked Pistachio, Candied Apple, Wild Honey
  • Cosmic Shimmer Mist: Meadow Lush, Blue Lime
  • Ranger Archival Ink: Red Geranium, Jet Black
  • VersaMark Ink 
  • Art Anthology Dimensional Medium - Brick (Stone Effect)
  • iCraft Stencils
  • iCraft Floral Natura Paper Card stock 
  • Snowflakes Stamp
  • Concord & 9th: Sophisticated Script Stamp Set
  • Ranger Clear Ultra-thick Embossing Enamel (UTEE)
  • WOW Cherry Red Embossing Powder
  • Ranger Glossy Accent 
  • Rhinestones, palate knife, foam tape, yellow floss, circle cutter, heat tool  

Steps to Create:
Background: 
  • Blend Cracked Pistachio ink on the art journal.
  • Stamp snowflakes stamp (2nd generation stamping) using Red Geranium Ink.
  • Spray the cosmic shimmer sprays at a close distance on random spots and let it dry .
Pre-preparation for ornaments:
  • Cut 2" diameter circle from white card stock using circle cutter or a die (6 in number).
  • Blend Wild Honey ink on the cut circles.
  • Cut small small squares from card stock and colour using Candied Apple Ink.


1st Ornament from Left:
  • Blend Candied Apple Ink on the prepared ornament through iCraft circle cluster Stencil.
  • Once the ink is dry, apply Glossy Accent on each of the circles and keep it aside for drying. 
2nd Ornament from Left:
  • Blend Candied Apple Ink on the prepared ornament through iCraft Stencil. 
  • Once the ink is dry, apply a layer of Glossy Accent on the full circle.
  • Once dry, reapply a second coat of Glassy Accent and keep it aside for drying.

Centre Ornament:
  • Rub VersaMark Ink on the prepared ornament and sprinkle UTEE and heat set.
  • Once the UTEE is evenly melted and hot, sprinkle another layer of UTEE and heat set again.
  • Repeat the process 3-4 times to get a thick layer.
  • Once happy with the thickness of the enamel, randomly sprinkle some Cherry Red embossing powder and heat set and while the entire enamel layer is still hot, stamp on it with Snowflakes stamp to give an embossed effect (Rubber stamps work the best for this technique and before stamping on hot layer of enamel, apply VersaMark Ink on the stamp to prevent any damage from Enamel).

4th Ornament from left
  • Simply stamp some snowflakes on prepared ornament and heat set with Cherry Red Embossing powder.

5th Ornament from left
  • Apply a generous layer of stone effect Art Anthology Brick Dimensional paste through iCraft stencil on the prepared ornament and let it dry.
Last Ornament:

  • Splatter few drops of watered-down Candied Apple Ink on the ornament & embellish with a few rhinestones.
To finish all the ornaments:
  • Adhere the coloured red squares and floss on the ornaments to complete them.
Finishing the Art Journal page: 
  • Arrange and mark placement for your ornaments on the page.
  • Using some water-down Candied Apple ink, create a shadow effect on the outer ends of markings (as the Candied Apple ink re-activates some of the green inks on backgrounds, it creates a subtle shadow for ornaments.
  • Once the ink is dry, adhere the ornament  to the page with foam tape and give an uneven outline to the page with colour of your choice.
  • Adhere the extra floss on the backside with glue.
  • To finish, stamp the sentiment using Jet Black Ink and Sophisticated Script Stamp Set.

I hope you enjoyed reading about my Art Journal Page. 

Wish you a Merry & Bright Christmas :) 

Love,
Dr. Neha Sanwalka Rungta
Crafty Flirtations