Thursday, May 31, 2018

Father's Day Card


Hi Friends,

Its Father's Day on 17th June. I am here with a masculine card that you could make for your father on this special occasion.


Supply List:
  • Bielo Smooth Card stock
  • Ranger Distress Oxide Inks – Iced Spruce, Broken China, Faded Jeans, Vintage Photo 
  • Ranger Distress Ink – Black Soot
  • Colour Box Frost White Pigment Ink
  • Archival Jet Black Ink
  • iCraft MDF gear embellishments & Metal watch embellishments 
  • Inka-Gold Jade Green
  • Sentiment Stamps from Peek-A-Boo
  • Fine paint brush, Foam tape, Mini-mister, Glue, Blending Tools

Steps to Create:

  • Cut and score card stock to create 5 by 7" card base 
  • Using a blending foam, blend Distress Oxide inks on 5 by 7” white card stock.
  • Add white and black splatters on the card panel using Black Soot and White ink. 
  • Distress edge of the blended card panel with Black Soot Ink and colour gears with same.
  • Add highlights to gears by rubbing and buffing Jade-Green Inka-Gold.
  • Adhere gears and metal watch on card panel using glue.
  • Blend Distress Oxide Broken China on a small piece of card stock and mist with water. Stamp the sentiment with Black ink and adhere on the card panel.
  • To finish the card, adhere the card panel on prepared card base.
Hope you liked this card.

(PS. This article was 1st published in the June 2017 issue of "Our Idea Book" Magazine)

Love,
Dr. Neha Sanwalka Rungta,
Crafty Flirtations 

Saturday, May 26, 2018

Dotted Floral Cards

Hi All,

Dot painting or painting with small little dots of various size has always attracted me and I have been wanting to try it for a long long time. Finally, when I recently brought the Dylusion Paints the vibrancy of the colors compelled me to finally take up dot painting. Though I have a long long way to go, I had great fun creating these cards using Dylusion Paints. I also got inspired by the colours (orange, blue, pink, green) and image of flowers at the Catchy Challenges to create this card.

Dot Painting On Cards

Dot Painting On Card

Dot Painting On Card
Supplies Used:

Steps to Create:
  • Cut and score a card stock to create a top folding 4.25" by 5.5" card base.
  • Cut flower and leaf shapes using dies. Color  flowers using Squeezed Orange paint or Spun sugar ink and leaves using Dirty Martini Paint or Cracked Pistachio ink.
  • Paint dots of various sizes on flowers and leaf using ball tools or paint brush.
  • Stamp thank you on card base. 
  • Stack 2 white flower die cut and adhere painted flower on top to add dimensions. 
  • Stick flowers and leaves on the card. 
  • Adhere dew drops to finish the card.

Hope you loved this funky floral card. 

I would like to enter this card at the Catchy Challenges #4. Theme: Let's Get Pinspired 

Love,
Dr. Neha Sanwalka Rungta

Disclaimer: The post includes some affiliate links.

Friday, May 25, 2018

Tips to take care of stamps

Craft stamps are a huge investment. If not taken care of appropriately, they can wear away with time. Here are some tips to help you take care of your stamps:

Some Stamps I Love

Storage:
  • Store your stamps in cool places. Avoid direct exposure to sun and high temperatures.
  • Avoid storing stamps in colander or wicker baskets so that stamps are not pressing against each other or metal as this can leave dents on the stamp and affect stamping.
  • DVD cases are a great alternative to store stamps. 
  • You can use clear sleeves/ pockets available in stationary stores to store your stamps if their packaging wears away.
  • Use shallow cartons or tote to store your stamps upright or hang them if possible.
Cleaning:
  • Always clean the stamps before putting them away after use. Stamp off any access ink on your stamp on a scrap paper.
  • If using water based ink to stamp, wipe the stamps with a moist cloth.
  • If using permanent ink to stamp, use a stamp cleaning solution to clean the stamps. Make sure to remove any cleaning solution from the stamp before putting them away.
  • If using Stazon ink, use Stazon cleaner to remove the ink. 
  • Never scrub your stamp hard to remove any inks as it can damage the design of the stamp.
  • Always let the stamp dry completely before storing them away. 
  • Chamois cloth available in car accessory stores is a great, economical alternative to baby wipes to clean stamps.
Conditioning & Reconditioning:
  • Many a times, new stamps dont stamp well at 1st go. Try stamping them with VersaMark or an Embossing ink for the 1st time on a rough paper before using your pigment/ dye inks for stamping. This conditions the stamps & most of the times is effective when using a new stamp.
  • Rubber stamps tend to become hard with time. You could apply a thin layer of glycerin and leave the stamp aside to dry to condition the stamp if it starts to dry. 
  • If your photo polymer stamps lose their stickiness, wash them with mild soap and water and let them self-dry. They will get back their stickiness.
These are some few tips to help take care of your stamps. If you have any more tips & tricks, please leave them in your comment and I shall add it to the list. 

Thursday, May 24, 2018

Scars Make You Strong - Art Journal Page

Hi,

Being a paramedic (dietitian), everything related  to health is intensified for me, however, at the same time I am always very calm about any major health related issue as I am aware about medical procedures and modes of treatment. So, when a few months back I underwent a surgery, I was very calm as I was supposed to be back and running within a week's time. However, I developed a post surgical complication and the complication didnt cure even after 2 months of surgery. For the 1st time in life, I completely broke down after 2 months, as this was a surgical complication that I was not ready for at all. I was home for 2 strait months and moved out only to see the doctor. At this moment, Tejal & Saumya's favorite quote uplifted me a lot. These quotes essential tell you that no matter how injured you are, you are only going to emerge a winner at the end.


"My Scars Are A Proof That I Survived" & "The Wound Is Where The Light Enters You" had such deep impact on me and helped me get positive in the testing times that when I decided to incorporate them in the art journal I made for Tejal, I decided to not add any other motifs on this page and keep complete focus on the quotes.


Also, as quotes were the focal point of the page, I wanted to add some more drama to the page and hence I decided to use a font with cracked look. I looked up online & found a font (free for personal use) that suited my purpose and used it for printing both the quotes. Even for the background I used Distress Crackle Paint & Alcohol Inks to give the intense cracked (scared) look. I added some patches of Nuvo Copper mousse with stencil to mimic healing wounds.


Supplies Used:

  • 6 by 7" card stock or chipboard
  • Tim Holtz Distress Clear Rock Candy Crackle Paint
  • Tim Holtz Stencil 
  • Ranger Alcohol Ink: Gold, Silver. Cranberry, Lettuce, Butterscotch 
  • Ranger Distress Ink: Candied Apple 
  • Nuvo Embellishment Mousse - Fresh Copper
  • Little Birdie (Itsy Bitsy) 2 in 1 texture paste (Used as gesso)
  • Paint brush, blending tool & foam, felt applicator, Sakura Microns, glue 
  • Printed quotes 

Steps to create:
  • Apply gesso on the card stock/ chipboard base and let it dry. Once dry, apply a thick coat of clear rock candy crackle and set aside to dry.
  • Dab various colours of alcohol ink (with felt applicator) on the dried page t o intensify the cracks. 
  • Apply Nuvo mousse through stencil.
  • Print and cut the quotes in small words. Colour the quotes using Candied Apple ink. 
  • Adhere the quotes on the page outline and outline the quotes on 2 sides using Sakura Microns to finish the page. 


I hope you liked this simple, yet intense page of quotes & get inspired to face tough times with strength & grit. You can view previous pages by clicking on links below:


View Page 2

View Page 1


View Page 3


I shall soon be back with Page 5.

Love,
Dr. Neha Sanwalka Rungta
Crafty Flirtations 

Wednesday, May 23, 2018

Some mixed-media - The Frugal Way

Hello.

Most often when people talk about mixed-media art, they say they dont want to try mixed-media as they find it very expensive. I have searched and found many frugal recipes online for crafty products and in my search for more inexpensive craft supplies, I did the "Frugal Mixed Media Course by Rashmi Tater of Aaradhya Creations". Sharing some of the projects, where in I used some of the techniques learnt during Rashmi's course. Her course is definitely worth for someone who is just starting out with mixed media and want to try their hands at mixed-media in an economical way before investing in expensive supplies.

P.S. Not all supplies used for below projects are frugal. I have used some products like Inka Gold from my stash and I have also altered the designs to suit my purpose.


Hope you like my try using Rashmi's Frugal mixed-media techniques. If you are looking for doing mixed-media frugal course, her course is definitely worth the money.

Love,
Dr. Neha Sanwalka Rungta
Crafty Flirtations 

Monday, May 21, 2018

A Feathery Great Day

Hey Friends,

I am back with a neat and clean card today.


Supplies:
  • iCraft Floral Natura card stock 
  • Die Versions A Great Day die
  • Spellbinders Die - Feathers
  • Ranger Distress Oxide Ink: Spiced Marmalade
  • Ranger Distress Ink: Candied Apple
  • Nuvo Mousse Fresh Copper
  • Foam tape, glue, water mister, heat gun 
Steps to create:

  • Cut and score Natura paper to create 4.5 by 5.25" side folding card base.
  • Smoosh Distress ink and Oxide ink on craft mat, mist with water, place white card stock on the ink to colour it and dry using heat gun. Repeat the layer till desired colour is achieved. 
  • Once the desired colour is achieved, die cut "A Great Day" and some feathers from it.
  • Die cut 2 "A great day" sentiment from white card stock and stack and adhere on top of each other. Adhere the coloured "a great day" on top of stacked white die cut.
  • Adhere the sentiment to card base using glue. 
  • Rub & buff some Nuvo mousse on feathers. Arrange and adhere feathers on card base to finish the card (adhere 2 feathers using foam tape for added dimension). 
Hope you liked this card.

Love,
Dr. Neha Sanwalka Rungta
Crafty Flirtations 

Beauty Emerges From Something Completely Falling Apart - Art Journal

Hello all,

I feel that in life one of the most essential things to be happy is to have "Hope" & "Faith". Hope that even if you are in tough times, better times awaits you. Hope that if you are unwell, you shall get well soon. Hope that all your wishes would come true one day. Along with hope, one also needs to have Faith. Faith not just in God but also in one's own ability to achieve what you want from life.  Faith that even if you fail at something or make a mistake, there is always a chance to succeed next time or correct your mistake.


Page 3 in the art journal that I made for Tejal is all about Hope and Faith. Both me and Tejal have been through difficult times this year. So, this page was a reminder for both of us that even if all doesn't seem okay at the moment, we should have hope and faith that things shall get better soon. And what signifies Hope & Faith better than a butterfly.  Butterflies represent Endurance, Change with Time, Hope and Life. Also, Tejal loves butterflies and hence was an added bonus to use them on this page.  

This page truly did test my hope and faith in myself too while I was creating it as I got some ink marks and texture paste marks on the page which werent as per my plan. But than when I added Butterflies to the page, these marks werent visible. Hence, whenever creating Art Journals dont get scared if you make mistake. You can always rectify it. 
I also wanted to use Khusboo's (Tejal's friend) favorite flower "Lavender" on this page. Lavender are symbol of refinement, grace, and elegance. The last 4 months have taught us that however difficult the situation is, we can always face them and come out as winners with grace and elegance. Hence, field of Lavender flowers was perfect for this page on Hope & Faith. 


Supplies Used:

  • 6 by 7" card stock or chipboard
  • White card stock 
  • Distress Oxide Inks: Broken China, Twisted Citron, Wilted Violet, Worn Lipstick 
  • Itsy Bitsy 2 in 1 texture paste (used as gesso)
  • Memory Box Stencil: Delphinium (#88571)
  • Kaisercraft Butterflies stamp set
  • Ranger Texture Paste
  • Violet Acrylic Paint 
  • Dyan Reaveley's Dylusions Paint Pens 
  • Ranger Black Archival Ink
  • Sakura Water Colour Pens
  • Scissors, Glue, Foam tape, Blending Foam, palette knife
  • Printed quote/ sentiment 


Steps To Create:
  • Apply gesso on the card stock/ chipboard base and let it dry. Blend oxide inks on the background.
  • Mix texture paste with violet acrylic paint and apply through stencil using palette knife. 
  • Once the texture paste is dry, draw stems using paint pens.
  • Stamp butterflies using black ink and fussy cut. Color using water colours (I used Sakura pens).
  • Adhere quote on the base using glue. 
  • Finish the page by adding butterflies. Add some foam tape between 2 layers of big butterflies to add dimension.

I would life to thank Saumya for lending the Memory Box Delphinium stencil to create the look of Lavender flowers :) I shall soon be back with the 4th page. 

View Page 1
View page one
 View Page 2
View Page 2


I would like to enter this art page at 


I shall be back soon with Page 4. 

Love,
Dr. Neha Sanwalka Rungta
Crafty Flirtations 

Sunday, May 20, 2018

Quick & Simple Eid Card

Hi Friends,

I am back with a quick Eid card made using minimal supplies.


Supply list:
  • iCraft Floral Natura White Card stock
  • Papericious Incredible India Paper Pattern
  • Martha Stewart Circle Cutter
  • Concord & 9th Sophisticated Script Stamp and Sophisticated Script Uppercase stamp
  • Ranger Archival Inks: Cobalt and Red Geranium
  • Pie Lane Sequins
  • Glue
Steps:

  • Cut, score and fold a card stock to make 6 by 6” card base.
  • Cut a 6 by 6” size paper from pattern paper and a 5.5 by 5.5” paper from white card stock.
  • Adhere pattern paper on card base and adhere 5.5 by 5.5” white card stock on top of pattern paper.
  • Using circle cutter, cut the moon from pattern paper. (Tip: You can cut it free hand or use any circle dies you have).
  • Adhere the moon on the card. 
  • Stamp the sentiment with Concord & 9th Stamps with help of Ranger Archival inks.
  • Finish the card with some sequins.

Hope you liked this card.

If you would like to win this card for yourself or a friend or a family member, subscribe to the blog and please comment below. I will pick a winner randomly to receive this card on 1st June. 

(PS. This article was 1st published in the June 2017 issue of "Our Idea Book" Magazine)

Love,
Dr. Neha Sanwalka Rungta,
Crafty Flirtations 

Friday, May 18, 2018

A single rose can be a garden - Art Journal Page

Hi Friends,

Life is a balance of good and bad times. Happy & sad moments. We may rejoice one moment whereas in the other moment we may be faced with a difficult situation. And only those friends who stand by you and be with you in the most difficult times of life pass the test of friendship. True friends never leave your side in either good or bad times. They are always there for you and they become an integral part of the world. 


The page 2 in the art book that I make for my friend Tejal revolves around this truth of life. Though I have never met her in real life, she has been my constant support & true friend in both thick & thin times of life over the last 1 year. We chat almost daily and I cant thank her enough for the amazing friendship. I choose another one of Tejal's favorite flowers "Roses" for this page as a rose depicts these feelings in true sense. The beautiful, fragrant rose flower depicts the beautiful moments of life whereas the thorns depict the difficult times of life. 


I used 2 different styles and colors of roses (red to depict happy times and black to depict difficult times) to build this page. Red is also one of Khushboo's (Tejal's friend) favorite color and black Tejal and my favorite color. I used glitter & shine on the red side to give an extra edge of happiness to good times of life. 


Supplies used:
  • 6 by 7" card stock/ chipboard 
  • iCraft rose & circular rose stencil
  • iCraft kraft card stock
  • Ranger texture paste
  • Pie Lane red pixie dust
  • VersaMark Ink
  • Ranger Black Embossing Powder
  • Distress ink: Black Soot, Candied Apple 
  • Dress My Craft Sparkling Dust 
  • Itsy Bitsy 2 in 1 texture paste (used as gesso) 
  • Circle cutter or die 
  • Finger dauber, palette knife, foam tape, glue, water mister, blending tool, heat gun 
  • Printed sentiment/ quote 


Steps to create:

  • Apply gesso on the card stock/ chipboard base and let it dry. Blend Candied Apple Ink, mist with water and dab with cloth (this ensures very light shade of ink on the base).
  • Apply texture paste through stencil on the right upper half of the page, sprinkle red pixie dust and set aside to dry.
  • Cut circles (2" diameter) from kraft card stock. Apply VersaMark ink through stencil using finger dauber and heat set using black embossing powder.
  • Adhere the heat embossed circles on the page using glue & foam tape for dimension. 
  • Apply glue on the right edges of the page and sprinkle with Sparkling Dust.
  • Finish the page by adhering the printed sentiment/ quote.


Please do let me know what you think of this page. I hope you like it as much as I loved making this. 


I would like to enter this art page at 


I shall be soon back with Page 3 of this art journal.

Love,
Dr. Neha Sanwalka Rungta
Crafty Flirtations 

Thursday, May 17, 2018

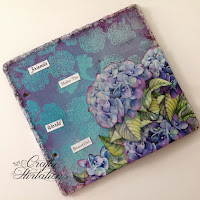
To Great Friends - An Art Journal Page

Hi friends,

They say friends are the family you choose for yourself & God has blessed me with some amazing friends who are now like family to me. Recently, I wanted to make a gift for my ever helpful, crazy, amazing crafty friend "Tejal", something that was personalized and woven with  elements that she & 3 of her friends (Saumya, Khushboo & myself) liked.

As Art Journals are my absolute favorite to make, I decided to make a mini, personalized Art Journal or Art Book for Tejal including our favorite quotes, motifs, colors & flowers or things that we like.


I used a 6 by 7 ready chipboard album to create this art journal as I wanted something sturdy and strong as it was going to travel all the way to Ahmadabad from Mumbai, but you could use a 300 gsm card stock for same. This art book contains 10 sides (5 pages back to back) all together. Here's the cover page of the journal.


Tejal's favorite flowers are Hydrangeas. So, I decided to use them as focal point on the cover page. However, when I started making the cover, I realized I didnt have  any Hydrangea stamps. I was on verge of giving up the idea of using Hydrangeas on the cover, when it dawned on me that I had Hydrangea Lawns pattern paper from Dress My Craft that I could use for focal point. The entire page is built around colour scheme of Hydrangea flowers using the heat embossing resist technique with Distress Inks for background as its my absolute favorite technique for background.


Supplies Used:

  • 6 by 7" card stock/ chipboard 
  • Dress My Craft Hydrangea Lawns 6 by 6 paper pack
  • Penny Black Blooming Gardens stamp set
  • Distress Inks: Seedless Preserves, Cracked Pistachio, Peacock Feathers
  • VersaMark Ink
  • WOW! Clear embossing powder
  • Itsy Bitsy 2 in 1 texture paste (used as gesso)
  • Dress My Craft Frosted Sugar Powder
  • Glue, scissors, foam tape, heat gun & blending tools
  • Printed sentiment 


Steps to create:

  • Apply gesso on the card stock/ chipboard base and let it dry. Once dry, apply Cracked Pistachio and Peacock Feathers ink using blending tool. 
  • Once the Distress ink has dried, stamp the flowers using VersaMark ink and heat set using clear embossing powder.
  • Apply Seedless Preserves (over Peacock Feathers) and Peacock Feathers (over Cracked Pistachio) ink to create a beautiful resist technique background.
  • Fussy cut the flowers from Hydrangea Lawns pack. Distress the edges using Seedless Preserves ink  and adhere to the base using glue & foam tape.
  • Apply glue to the edges of the page and sprinkle with Frosted Sugar Powder.
  • To finish the page, adhere the printed sentiment/ quote. 

Hope you love the cover page from this art journal. I shall be back soon with Page 2 of the journal.

I would like to enter this art page at 


Love,
Dr. Neha Sanwalka Rungta
Crafty Flirtations. 

Monday, May 14, 2018

Quick card using Mayura Collection Paper

Hi Friends,

The Craft Studio launched their 1st paper pack "Mayura Collection" under their brand name "iCraft" a few weeks back. Dinesh & Forum very kindly sent me a complementary pack of the papers to try. 

About Mayura Collection:
  • This pack comes in 12 by 12" size
  • Has 30 printed sheet
  • 4 of these sheets are UV Embossed, Textured Embossed, Foiled and Matt laminated
  • The pack also includes 4 motif sheets, 1 sheet of quotes and 1 envelope template 
  • They are ideal for making cards & Scrapbooks
The motif and quotes sheet make it so ease to whip up cards in no time. Sharing with you a card that I made in less than half an hour (only cause it involved fussy cutting). 


    Supplies:
    • iCraft Floral Natura Paper
    • iCraft Mayura Collection Pattern paper
    • Scissor, foam tape, glue, embossing tool 

    Steps to create:
    • Cut and score Natura paper to create 4.5 by 5.25" top folding card base.
    • Cut one of the pattern papers to 4.25 by 5" size and adhere on top of card base with glue. 
    • Fussy cut 2 floral motifs from motif sheet. Shape one of them using embossing tool and adhere on top of the other using foam tape for dimension.
    • To finish the card, adhere the motif (using glue) & quote (using foam tape) on the prepared card base.  
    Hope you like this quick card.

    Love, 
    Dr. Neha Sanwalka Rungta
    Crafty Flirtations 

    Saturday, May 12, 2018

    Bees come where flowers blossom - Art Journal Page

    Hi Friends,


    Last time I shared process of creating the above rustic & grungy art journal page with you all. However, once I finish the page, I realised I adhered the sentiment sticker upside down and being an art journal, I had to correct it so that when I flip through the journal, I can read it correct. So, I removed the sentiment stickers & edited the page to add flowers & some bees. Here is the updated page & process for same (beyond what is described in the previous post).


    Supplies:

    • White card stock
    • Floral Die Cut Outs
    • Ranger Distress Oxide Inks: Twisted Citron & Salty Ocean
    • Ranger Distress Ink: Black Soot
    • Ranger Black Archival Ink
    • Concord & 9th Perfectly Penned Stamp
    • Sakura Micron, Markers & Pencil colours for colouring, Water Mister, Heat Gun, Glue. scissors

    Steps To Create:
    • Smoosh Oxide inks on the craft mat, mist with water and colour floral cut outs by dipping them in ink. Dry them using heat gun. Repeat the process till you achieve the desired effect. Add some dots on flower center using black Micron. 
    • Smoosh some Black Soot ink on the craft mat, dilute with water and make splatters on the page. 
    • Draw some honey bee on card stock, colour using markers or water colours and fussy cut.
    • Stick the flowers and honey bees on the journal page.
    • Add shading around the flowers using colour pencils.
    • Finish the layout by stamping sentiment using black ink. 
    I hope you love this updated version as much as I love it. 

    Please leave your love & feedback in the comments section.

    Love,
    Dr. Neha Sanwalka Rungta
    Crafty Flirtations 


    Wednesday, May 9, 2018

    Quick Rustic And Grungy Art Page

    Hi Friends,

    I am back with another quick & simple art journal spread with a little grungy & rustic look.


    Supplies:
    • Gesso
    • Ranger texture paste
    • iCraft stencil
    • Ranger Distress Ink: Peacock Feather, Stormy Sky, Bundled Sage
    • Dymo Label maker
    • Palette Knife, Blending Tool, water mister, kitchen towel, paint brush 
    Steps to Create: 
    • Apply gesso on the journal page with paint brush and let it dry. (Tip: Apply thick coats on some places for added texture). 
    • Once the gesso is dry, apply texture paste through stencils with help of palette knife and let it dry. 
    • Once dry, blend distress inks on the page using blending tools.
    • Mist water and dab on various places using kitchen towel to pick up some ink. 
    • Make sentiment using Dymo Label maker & stick on center of the page.
    Hope you love the grungy & rustic look of this art journal page.

    Love,
    Dr. Neha Sanwalka Rungta
    Crafty Flirtations 

    Saturday, May 5, 2018

    Seek Magic - An Art Journal Page

    Hi Friends,

    Sometimes all it takes to create an art journal is a few Distress inks, a stencil and stamps. I am here to share a simple and elegant art journal spread. 


    Supplies:
    • Ranger Distress Ink: Peacock Feather, Stormy Sky, Picked Raspberry, Candied Apple, Black Soot
    • Ranger Black Archival Ink 
    • Dylusions Stamp: Doodle Delight DYR40927
    • Concord & 9th Perfectly Penned Stamp
    • iCraft Stencil
    • We R Memory Keepers M,A,G,I,C mini alphabet stamp sets
    • Sakura White Gelli Roll Pen
    • Water Mister, blending tools, heat gun, paint brush  
    Steps to Create:
    • Blend Peacock Feather, Picked Raspberry and Candied Apple ink on the journal using blending tools.
    • Mist with mini mister and dry using a heat gun.
    • Apply Stormy Sky ink over Peacock Feather section through a stencil in some parts. 
    • Apply Picked Raspberry over Picked Raspberry section and Candied Apply over Candied Apple section through a stencil in some parts.
    • Smoosh some Black Soot ink on a craft mat, dilute using some water and make splatters on the journal page using a thin paint brush. 
    • Stamp various images from Dylusions stamp at different heights from bottom of page using black ink.
    • Stamp the sentiment using black ink. 
    • To finish the layout, add highlights on the sentiment using white gel pen.
    Hope you all like this art journal page.

    Love,
    Dr. Neha Sanwalka Rungta
    Crafty Flirtations 

    Friday, May 4, 2018

    Dream - Floral Mixed Media

    Hi Friends,

    I reviewed the Little Birdie Embossing Texture Paste a few days back. Today I am back with a project where I actually used the Embossing Texture Paste for some quick & amazing effects.


    Supplies:
    • Little Birdie 2 in 1 Texture Paste (use as Gesso)
    • Little Birdie Embossing Texture Paste Frosty Fizz
    • Little Birdie Flower Pack 
    • iCraft MDF
    • Penny Black Stencil Hypnotic 
    • Ranger Distress Spray Paint - Squeezed Lemonade + Home made spray inks in shades of yellow and light orange  (numerous recipes available online)
    • Nuvo Embellishment Mousse - Fresh Copper 
    • Palette knife, glue, hot glue gun, flower pollen, heat gun
    • Canvas/ Ply 
    Steps To Create
    • Apply some Gesso on the base and let it dry.
    • Adhere mdf with glue and apply Gesso over it.
    • Once the Gesso is dry, colour using spray inks and let it dry.
    • Apply embossing texture paste through stencil and with palette knife on corners and heat set. 
    • Apply nuvo mousse on embellishments and rub here and there on the canvas for added texture.
    • Finish by adhering flowers and pollen. 


    Hope you loved this quick, simple & beautiful mix-media layout. I absolutely love the texture created using the Little Birdie paste and how it absorbed some of the colour. 

    Do leave your feedback in the comments section.

    Love,
    Dr. Neha Sanwalka Rungta
    Crafty Flirtations 

    Thursday, May 3, 2018

    Photo Transfer on Wood

    Photo transfer is a technique to transfer an image (most often an actual photo print) on a canvas, wood, MDF or clay to create personalised gifts. Today I am sharing a photo transfer project done on a piece of wood. When you transfer a photo on wood, it gives a vintage look to project due to the rough texture of the wood.

    Project created for Our Idea Book By Dr. Neha Sanwalka Rungta 

    Supplies:
    • Piece of wood
    • Photograph or a Picture printed using laser printer 
    • Transfer mediums/glue such as: Gel Medium or Mod-Podge or Mod-Podge Photo Transfer Medium
    • Sand Paper
    Steps to create:
    • Sand the paper with sand paper to get ride of any prominent edges. 
    • Apply an even coat of Gel Medium or Mod-Podge on the wood.
    • Place your photograph, face down on the wood and press it lightly with a cloth to remove any creases.
    • Keep it aside to dry for 24 hours. 
    • Once dry, spray water on the image and light rub with fingers to peel of the paper to reveal a beautiful photo transferred project. (Tip: spray water on one part of the image and work on one part of the image at a time).
    (PS. This article was 1st published in the June 2017 issue of "Our Idea Book" Magazine)