Hi Folks,
 '
'


Hope You All Liked The Beautiful Scrapbook We Both Made
Love,
Dr. Neha Sanwalka
Crafty Flirtations
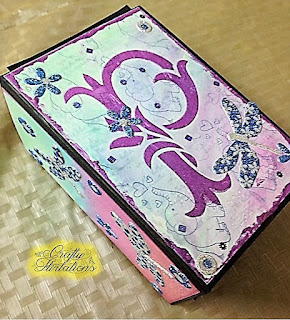
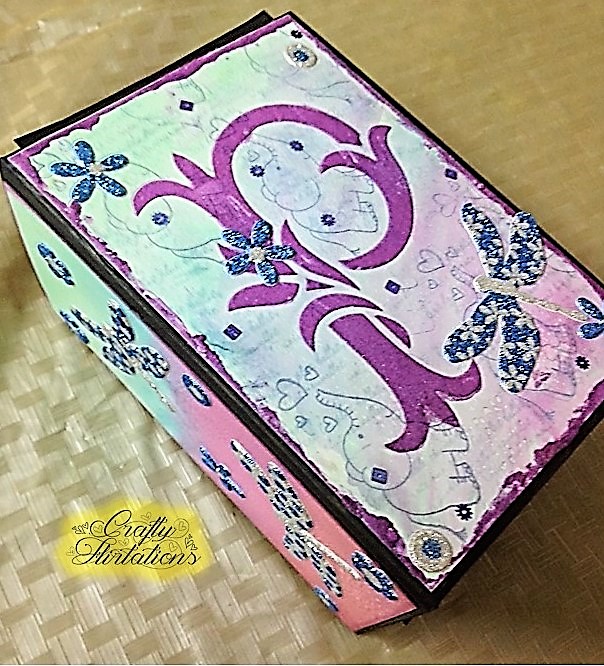
I am here today with a very special post. One of my close friends Hetal (I have known her for almost 16.5 years now), wanted to learn distress ink techniques for a long time. Initially we had thought we would make cards with the background we create, but her nephew turns "6 months" this month and so we decided to make 5" by 7" scrapbook instead of cards with all the distress ink techniques we do.
Her nephew's name starts from "P" and is a Leo. So we have incorporated a lot of these elements in the scrapbook. Also the little boy loves multi-colours and as he is a small kid, we decided to use different colours through the scrapbook and not just the usual shades of blues & purples that are conventionally used for boys scrapbook. Along with distress ink techniques, we also used artistry inks (Indian brand), stencil techniques, stamping, spray paints & gelatos for some of the pages in the scrapbook. Hetal picked up distress ink techniques very quickly and I am so proud of her 1st time efforts distressing & making this album. So here is presenting the scrapbook that the 2 of us built together. I have mentioned various techniques & main supplies we have used for each of pages below the images along with those used for the cover page. 270 gsm Iris Paper was used to create all Backgrounds. There is also a small video at the end to show you all the interactive elements that we had incorporated in the album.
 '
'
Distress Inks For Background: Bundled Sage, Peacock Feather, Cracker Pistachio, Seedless Preserve
P Stencil is from Pie Lane & Stenciled With Ranger Texture paste mixed with Pixie Glitter from Pie Lane & Lavender Acscents Spray Paint from Hampton Art. The same texture paint was applied on edges with spatula
Stamps Used: Penny Black Jumbo Love & Bo Bunny It is Written

Distress Inks For Background: Peacock Feather, Cracker Pistachio, Seedless Preserve


Inks for background: Picked Raspberry Distress Ink & Blaze Artistry Ink

Geltaos: Pistachio & Spearmint

Distress Inks For Background: Fried Brick, Wild Honey, Peeled Paint, Rusty Hinge
Stamps: Stampendous Peony
Technique: Water Lifting
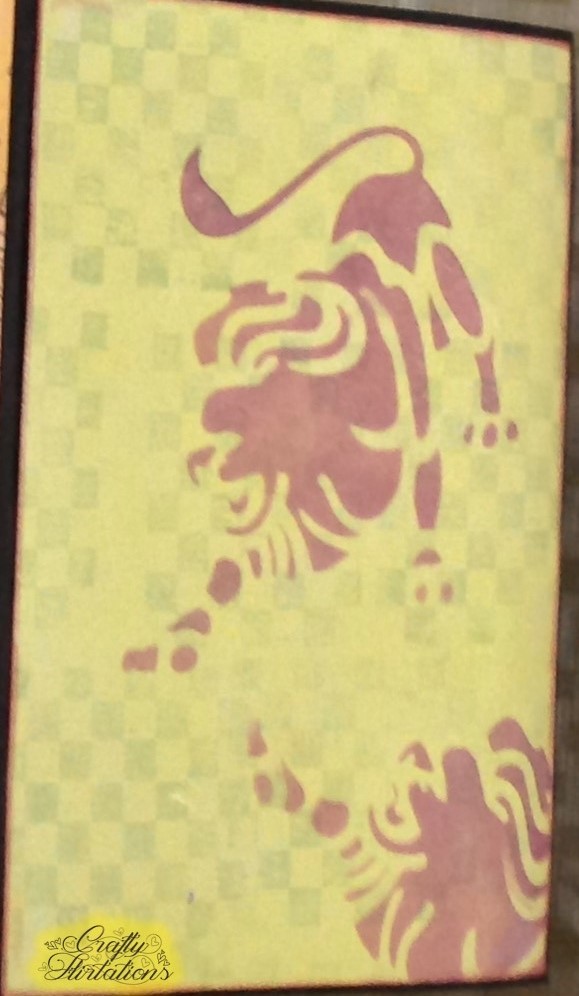
Inks For Background: Lime Kiss Artistry
Stencil: Pie Lane Leo Stencil stenciled with Blaze Artistry Ink
Stamp: Prima Checkered Stamp


Gelatos on left background: Blueberry, Boysenberry, Cotton Candy, Grape Grape
Gelatos on right background: Pistachio, Green Tea, Lime Lime, Spearmint
Technique: Drip technique

Inks Used For Background: Artistry Blaze & Distress Peacock Feather
Stamp Used: Scrapberry Kids Fun Happy Birthday

Ink for background: Distress Seedless Preserves & Artsitry Lavedner
Whimsy Holly

Ink For Background: Artistry Blaze
Technique on background: Stamping with pearlised water

Gelatos on left: Blueberry, Boysenberry, Cotton Candy, Grape Grape
Stamp Used: Scrapberry Mother's Treasure First Smile

Distress Inks on Left Page: Cracked Pistachio, Seedless Preserve, Peacock Feather, Pine needles
Stamp used: Itsy Bitsy Fazzy Blutterly
Technique Used: Resist technique using Clear embossing powder
Distress ink on Left: Seedless preserve & Faded Jeans
Stamp Used: Lawn Fawn Whale You Be Mine

Inks for background: Distress Dried Marigold, Distress Stormy Sky, Artistry Moon Crate, Artistry Lime Kiss
Stamp: Lawn Fawn Pa Rum Pa Pum Pum

Artistry Inks Used For Background: Blaze, Orange Popsicle & Lime Kiss
Technique: Resist technique using white embossing power

Artistry Inks Used For Background: Blaze, Orange Popsicle & Lime Kiss
Technique: Resist technique using Versamark Ink

Background w as done using distress ink smoosh technqiue
Stamp: We R Memory Keepers P alphabet and stamped using gelatos
Also used Bo Bunny It is Written Stamp

Inks for background: Lime Kiss Artistry, Artistry Dark Garnet & Peeled Paint Distress Ink
Techniques: Applied Artistry Dark Garnet & Peeled Paint Distress Ink on bubble wrap paper and stamped on Iris Paper. We then Spritzed it with pearlized water and allowed artistry & distress colours to bleed and blend. Then we applied Lime Kiss artistry colour on top to blend and bring it all together.
Stamp used: Kaiser craft wood grain & Scrapberry kids fun happy birthday stamp

Stamp used: Kaiser craft wood grain & Scrapberry kids fun happy birthday stamp
Here is a small interactive video:
Hope You All Liked The Beautiful Scrapbook We Both Made
Love,
Dr. Neha Sanwalka
Crafty Flirtations

